Pokazywanie postów oznaczonych etykietą memorykeeping. Pokaż wszystkie posty

Scrapbooking Layout Tutorial with Janna Werner

12x12 scrapbook layout
Hello crafty friends, it's Janna. I have a fun scrapbooking layout tutorial for you today. Before I share my thoughts on today's page, I'd like to remind you to use the code janna10 in the Studio 40 shop for a 10% discount! Now, let's take a look at the scrapbooking page first before diving into the tutorial. 

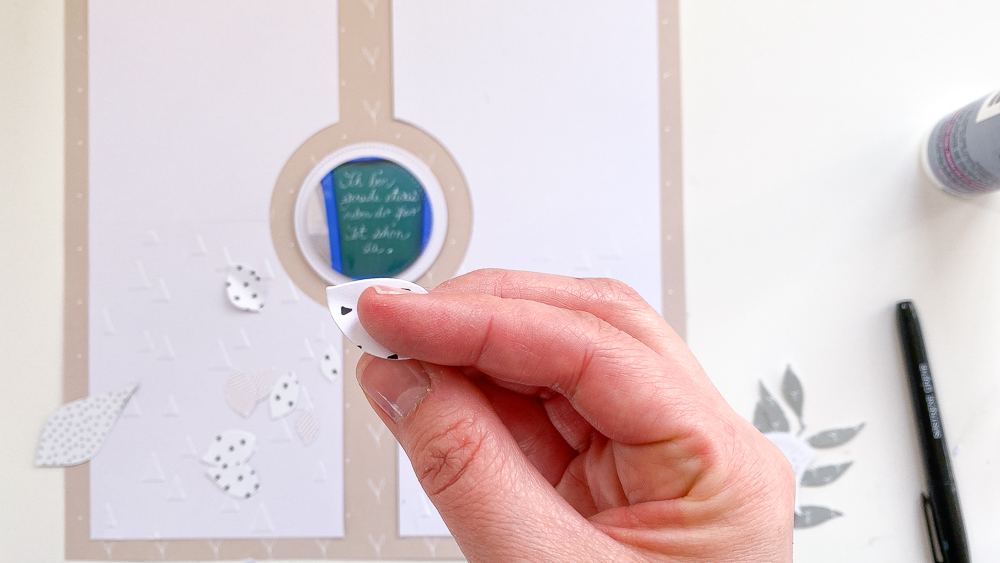
On the photo is a sign that stood in front of a little shop in Cuxhaven, Germany. It says: "Ich bin gerade etwas neben der Spur. Ist schön da." which means "I am a little off track, it's nice there." My initial thought was, to create an asymmetrical layout, but in the end I decided against it. Instead, I went for an organized, clean look, as this is how I feel sometimes: organized on the outside and chaotic on the inside. Do you know what I mean?!

Now, let me show you how I create the page.
 

I choose a neutral background from the Don't Grow Up collection and cut 2 cm from two sides of a white 12x12" cardstock.


With a circle cutter, I cut a circle (10 cm diameter) into the middle of the cardstock. Then I cut the cardstock in half and trim it to fit onto the patterned background paper.


With the Big Shot and an embossing folder I create a dimensional arrow pattern on the lower half of the cardstock pieces. The pattern fits the Studio Forty stamp I am using later perfectly.


The Essentials doublesided patterned papers are beautiful, but also the floral stickers. I use both to embellish the page. I adhere the stickers onto cardstock and cut them out with scissors. Like this, I can easily add dimensionals beneath the stickers. This will add more depth when applied to the layout.


As you can see on a previous photo, I use double sided adhesive to glue the white cardstock pieces onto the background and dimensionals to adhere the photo. In the next step, I am creating a little cluster on the bottom right, using a black marker to draw little dots onto the paper. I bend the leaves with my fingers for more depth.


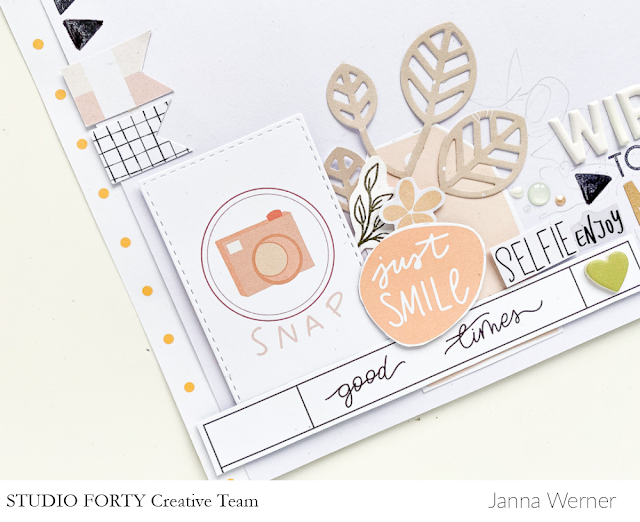
I cut out hearts from the Essential mint and pink tabs and decorate the left side of the photo with leaves, flowers, enamel dots, hearts and die cuts.


Here you can see the arrow stamp from the stamp set To Do Labels which fits the embossed pattern so well. I am finishing the page off with a little bit of journaling, stamping and liquid pearls around the photo.

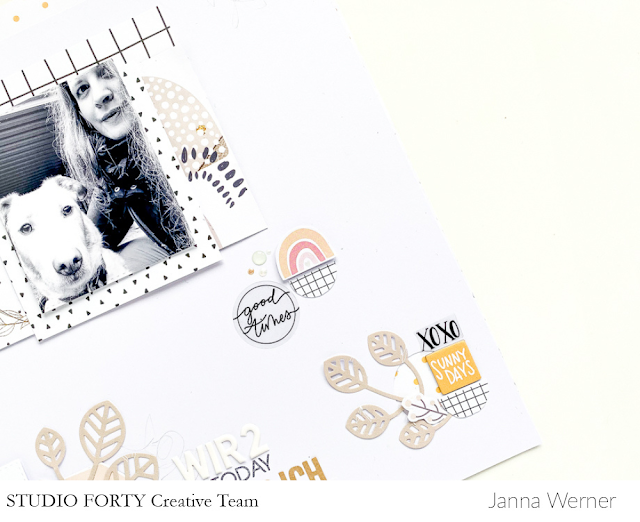
Here are two more detail shots of the scrapbooking layout where you can see the different layers and textures.


How do you like the outcome? If you have any questions regarding the tutorial, just let me know in the comment section below. You can also find me on Instagram and Youtube.

 
Please check out my other Studio 40 posts for more ideas and inspiration.

Have fun,
Janna


Blurred clusters scrapbooking layout | Janna Werner

clustering
Hello crafty friends, it's Janna. After last month's scrapbooking layout with round photos, I am back with a cluster page. Before I share my thoughts on today's layout, I'd like to remind you to use the code janna10 in the Studio 40 shop for a 10% discount! Now, let's take a look at the scrapbooking page.

When starting a scrapbooking page, my first step is to collect the embellishments I'd like to use. I might add more in the process or put some aside.

Usually, I lay out the cluster design before glueing the items onto the page. The design of the clusters may change during the process of adhering everything. If you want the arrangement to be exactly the same as the draft you made, you might want to take a picture of the design before adhering.

There are many ways of designing a cluster, I decided to go for a blurred one: sometimes it's hard to tell if a page includes one, two, or more clusters as the different areas on the page correspond or maybe overlap. This is what I like to call the "blurred cluster" design. 
I did this with the bottom cluster on the left and right as well as with the mini cluster below the photo. Each is a seperate cluster, but as they are so close to each other, they become a blurred arrangement.


Do you like clustering? Or do you prefer clean and/or non-dimensional pages? If you haven't tried working with clusters, I challenge you to do so! :-) Make sure to tag Studio 40 and me (@jannawerner) on Instagram and Facebook when sharing your creations. 


Have fun, 
Janna 


supplies used (discount code janna10) 
Essential Collection: enamel dots, stamp set Noteworthy, doublesided patterned paper (10x21cm), phrases transparent stickers, journaling cards, tabs b&w, just lovely color stickers, flowers stickers, words color stickers // About me Collection: color stickers // Here & There Collection: chipboard stickers // Adore Collection: transparent stickers // Don't grow up Collection: chipboard stickers, Patterned Paper // Story details Collection: chipboard frame stickers // Together Collection: Patterned Paper Memory Lane


Layout FUN | by Sonja Voigt

layoutscrapbooking

Hello and welcome to a new blog post. Today I'm going to show you a new layout in my 6x8 album from my son. The recordings were made at home in our garden. Here we enjoy our free time and spend time with the family.


I chose one of the papers from the LAZY DAYS series and cut out many of the small surfboards and skazeboards by hand. I glued this on the lower edge with an adhesive roller and adhesive plate. I just cut off the protruding corners.


With my printer at home I printed out different pictures in different sizes and deposited them with one of the papers.


For decoration I used different stickers from the series and created clusters with them.


Finally, I embroidered the edges by hand.


As a cover for the summer I punched out letters with an alphabet punch board and glued them to a white cardstock. I then glued the whole thing onto tracing paper. Now all sides just don't have to be punched. And done.


I hope you enjoyed my little inspiration.
See you soon and stay healthy.


Minialbum JUNE | by Sonja Voigt

memorykeeping

Hello and welcome to a new blog post. Today I have a little mini album with me for you. And it's really small, actually only has 4 sides, but that doesn't make it any less nice for a few memories from the month of June. Finally the weather is summery and that's why the pictures fit the LAZY DAYS summer series even more.


First I made the blank for the mini album with one of the papers and a punch. I punched out two pieces for this. I stitched the pages with a simple thread stitching.

Then you can stick in the pictures immediately and decorate the mini album. I decided to fuzzy cut some embellishments from the smaller papers to decorate one page .

Since the series is very colorful and diverse, I decided to use black and white images. This way the colors come into their own.

Thank you for stopping by today and have a nice weekend now.


HAVING FUN Layout | by Sonja Voigt

clear stamps

 Hello everybody.

lazy days - that would be good for me. Just let your mind wander, do nothing, enjoy the sun, spend time with my family.

But unfortunately this is not going to happen at the moment, my head is all the way up and my vacation in the summer is unfortunately shorter than planned.

But I can at least indulge a little in memories with the new and wonderful LAZY DAYS series.

Last summer we spent a day at Filzeich, rented a beach chair, enjoyed the sun and also paddled a little.

And the colors of the series go perfectly with the photo and especially the motifs, beach bags, slippers, beach towels and much more.

I stamped the frame for the layout with many small stamps from the stamp plates of the series. And I love to work with black stamp ink on summery layouts. I hope I could give you a little inspiration and I'm already looking forward to the next post.

See you soon and enjoy the sun and the first days of summer.


Suitcase minibook | Yukie Bessho

Home deco


Hello everyone!


So have you all checked the 'Lazy Days' collection?
Beautiful colors matches all the summer situations!

Today I would like to share my suitcase mini album!
Very much ready for the summer vacation!!
SO this is the suitcase. Yes, it is a container for the mini album!
Although it is just a case of the album, I have spent a lot of passion on this. 

The tassel suit perfectly with this luxe trolley bag.

The wheel has two silver colors. Simply sheer silver and glitter silver. In the center, you can see I have placed Studio Forty's famous enamel dot!
The title 'let's go somewhere' is like the keyword. Everyone wants to go somewhere after the pandemic, right?
Ok this is how the album is stored. 
The chipboard frames are great! They give so much accents on projects. 


So the mini album is out.  I have also used the tassel for the album, too. 

Inside the pages. I have used some transparent sheets to have some 
clear, summer like impressions. 
I have cut out the rose to hold the lovery journal card.
Some flips and extra pages. 
Just love the blue berries!! The blue berry journal card is wide. 
I have folded it in half and made an extra page.
The back  of the blueberry page; tie dye page!  Great for journaling!
The very last page. Little mermaid!


Here is a short video for the mini album! 
Also on YouTube →https://youtu.be/ckmWh1FBLGM

It was a great fun to make this project. 
I have used paper straws for the suitcase handles.
and plastic straws for the corners. 

Hope you liked my project!

Thank you for staying with me until the end. 
See you soon again!


For Lazy days collection →Click here!