.png "Menu")

Fast pages...⎪Heidi Ma
...in Traveler’s Notebooks
Working in Traveler Notebooks is such an easy way to document memories – and it can also be a fast way! I would like to show you how quick and easy you can handle it...
Very helpful is a Traveler's Notebook kit (like this one: MAGIC FALL -Notebook edition), because you can work with it immediately. The papers fit perfect to one side and all you have to do is to choose a compatible photo...
Here you are with two possibilities:


Now there’s not much left to do: a title (if you want to have one) and some little details like chipboards, stickers or stamps – that’s it!


I like it a lot, when both sides connect to each other in some kind of way – such as the little farns, that grow on both sides.
Certainly you also can write directly on the paper, like I did it on this spread:

I love my old typewriter and perhaps you noticed, that I use it always for journaling in my notebooks.

The other possibility:
You added your photo on the patterned paper.
Huuuh – now you have to fill a whole, blank side... But no problem, it’s the same procedure as above:
Write down your journaling and play around with stamps, cut outs, chipboards...

You can work directly into a notebook, but you can just as well work on a piece of paper (in size of a full page), that you stick in after it’s ready.

For this spread I only used stamps (I LOVE the little star-stamp from the Fairytales - stamp set #76!!!!): with coloured inks (in the colour of the patterned paper - this is my connection of the both pages) and on a little piece patterned paper. Done!

Perhaps you give them a try?

This is what I used for my pages (click on the words and you'll find them in the shop)
Papers:
MAGIC FALL -Notebook edition
Stamps:
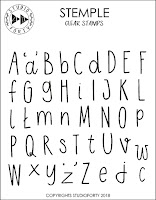
Alpha Typed - stamp set #79
Magic - stamp set #78
Fairytales - stamp set #76
Chipboards:
Magic Fall- Ferns
Summer travelove -I was here
Stickers
Magic Fall- transparent stickers
Magic Fall - paper strips - sticker set


0 komentarze:
Zostaw komentarz, będzie nam miło.