Hello friends, it's Nuria today! How are you doing? It is curious how you start a LO with a clear idea and suddenly, it turn out in another one completely different. In this case, I started rolling pieces of paper to make a specific composition, but while rolling it I couldn't see anything else than venetian blinds for windows! :O Three venetian blinds to be exact!;)
Hitchkok's movie "The Rear Window" came to my mind... I would have to create three windows... I tried a square die cut four times per window and... it worked, don't you think? I glued the picture under the window on a white cardstock.
I stuck a little piece of cardboard to make the upper side of the venetian blind and I covered it with the corresponding
patterned paper. I tried to recreate the typical rope loops of these blinds with some white thread. I added a couple of coloured wooden balls at the end of the thread.
Then, it was time to decorate the windows! I recreate flowerpots with
pink and green tabs (color stickers set) and I fulled them with
flowers!
Some
die cuts underneath the windows and some
phrases on top finalised windows decoration.
That's all for today! Hope you had enjoyed today's post. Don't forget to visit Studio Forty shop website, you will get 10% off with the code nuria10!
Have a lovely week!
Nuria
Bardzo lubię dodawać do prezentów czy zamówień własnoręcznie zrobione dodatki np. zakładki czy tagi z podziękowaniem. Zawsze kiedy mam trochę czasu staram zrobić się kilka takich rzeczy na zapas!
Tym razem zainspirowana moodbordem i jego pięknymi kolorami:
oraz kolekcją ESSENTIALS 2023:
stworzyłam tagi - zawieszki:
Do wycięcia kształtu bazy możecie posłużyć się wykrojnikiem, dziurkaczem ale spokojnie poradzicie sobie używając gilotyny i nożyczek oraz ołówka i linijki.
Później wystarczy robić dziurkę i przewlec sznureczek oraz dodać kilka ozdób. Jak zapewne zauważyliście skrawki które odcięła na dole naszego Taba chorągiewki przykleiłem do góry (drugą stroną papieru)! Potem wycięłam kilka elementów z arkusza papierów i użyłam naklejek:
Oczywiście nie mogło zabraknąć dotsów i tak prezentuje się całość:
Kropką nad i całej pracy są dorysowane pisakiem przeszycia albo zawijaski! Na pewno macie cienkopis, którym możecie je narysować:
Jak Wam się podoba taki efekt?
Magda N.
12x12 scrapbook layout
Hello together! Kerstin here today with a new layout inspiration. Sometimes you "sneak" around a paper that you like so much that you actually don't want to use it. That's what happened with the
Lunare "Star Trails" paper. But for this layout, I finally used it! YAY! Let's get started!
Isn't this paper amazing? For this I cut out leaves from the Everyday Story "Make Art" paper. I also always need an eye catcher on my project and for that I used the Flowers Sticker Set.
A photo does not always have to be used in its entirety. It gives a nice effect when the photo is cut into different sized squares. I also cut the paper into different sized squares and arranged both on a white 12 x 12 cardstock before I taped it.
I glued these squares partly with 3D Foam or liquid glue. The flowers stickers I have first attached to copy paper and then cut out. They can be arranged (for me) so better on a project. I always do it that way with stickers!
I arranged the cut out leaves and
Flower Stickers on the opposite sides of my photo. I added them with the
Essentials Word Color Stickers Set, the
Phrases Sticker Set and the
Simple Life Color Stickers Set.
Something was still missing for me! From the scraps of paper I made small rolls by rolling the paper over a round pen and taped the end with double-sided tape. I find these little rolls complement the layout beautifully! And of course, Dots 3D Stickers can not be missing. Here I have used
Lazy Days 3D Sticker Set Dots.
I hope you like this inspiration and the next time you have the courage to cut up a photo! I am already excited about your project.
See you next time!
Kerstin xx
essentials
Hello crafty friends, it's Janna. I love a good moodboard challenge and am happy to present a fabulous inspiration to you today. Before I share my thoughts on the scrapbooking layout below, I'd
like to remind you to use the
code janna10 in the
Studio 40 shop for a
10% discount! Now, let's get started!
This is the moodboard that was given to the Design Team to create projects inspired by this collection. You have already seen lots of great layouts, ATCs and mini albums from the gorgeous ladies of the Studio Forty DT, now it is my turn to share how I used the moodboard as inspiration for my scrapbooking layout.
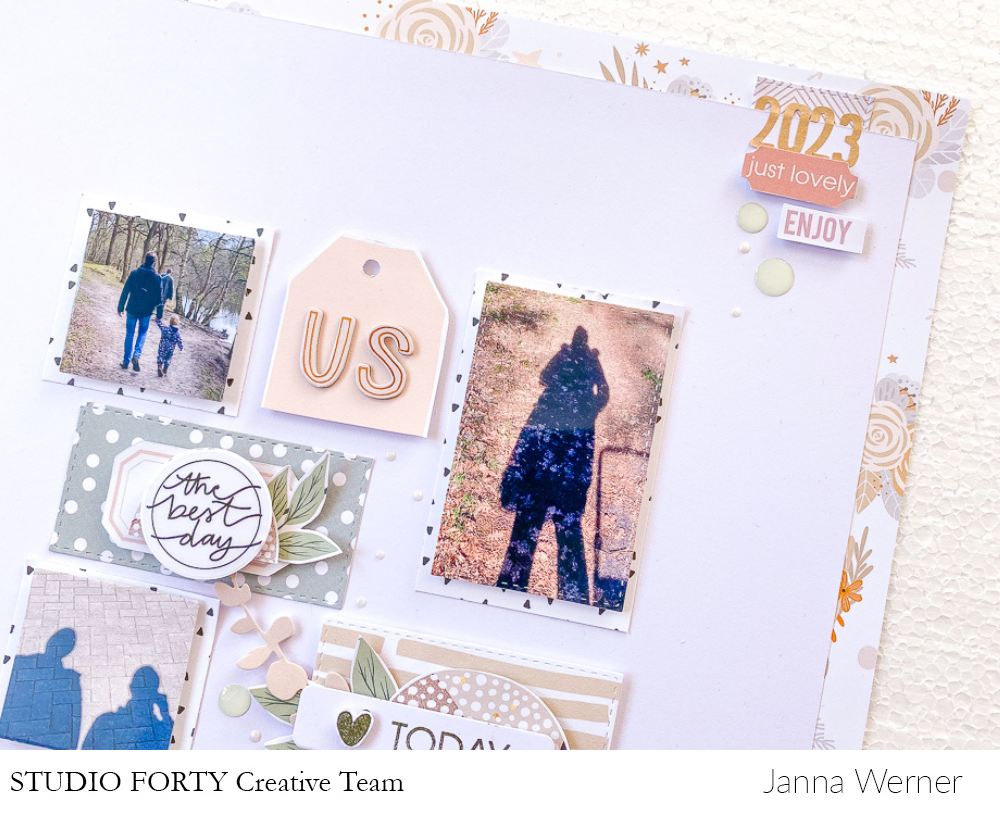
The first thing I was drawn to, was the color combination, obviously. The next thing was the arrangement of the board and the placement of text. I decided to use all of these things in my project and this is how it turned out.
Here are a few tips how to use a moodboard as inspiration for a scrapbooking layout:
- copy the color combination
- use the same amount of elements (I added three pictures, for example)
- add similar shapes and sizes
- apply the entire arrangement of the moodboard onto the scrapbooking layout
How do you like the outcome? If you have any questions, just let me know in the comment section below. You can also
find me on
Instagram and
Youtube.
Please check out my other Studio 40 posts for more ideas and inspiration.
Have fun,
Janna
supplies used (discount code janna10)
.png "Menu")