Anabel
Hi pretty!
I'm Anabel from @cattaleiasoul. Today I am in the
studio forty blog to show you
the shaker tag that I made with the new
Lunare collection.
The first thing I've done has been to choose
the papers, and size.
For this occasion I only needed two 10x21 papers
and coincidentally
it is the same pattern but each one I will use for
one side.
I really like the sewn effect, so I used my sewing
machine quite a lot.
I have done the first sewing around the paper that
will be the base.
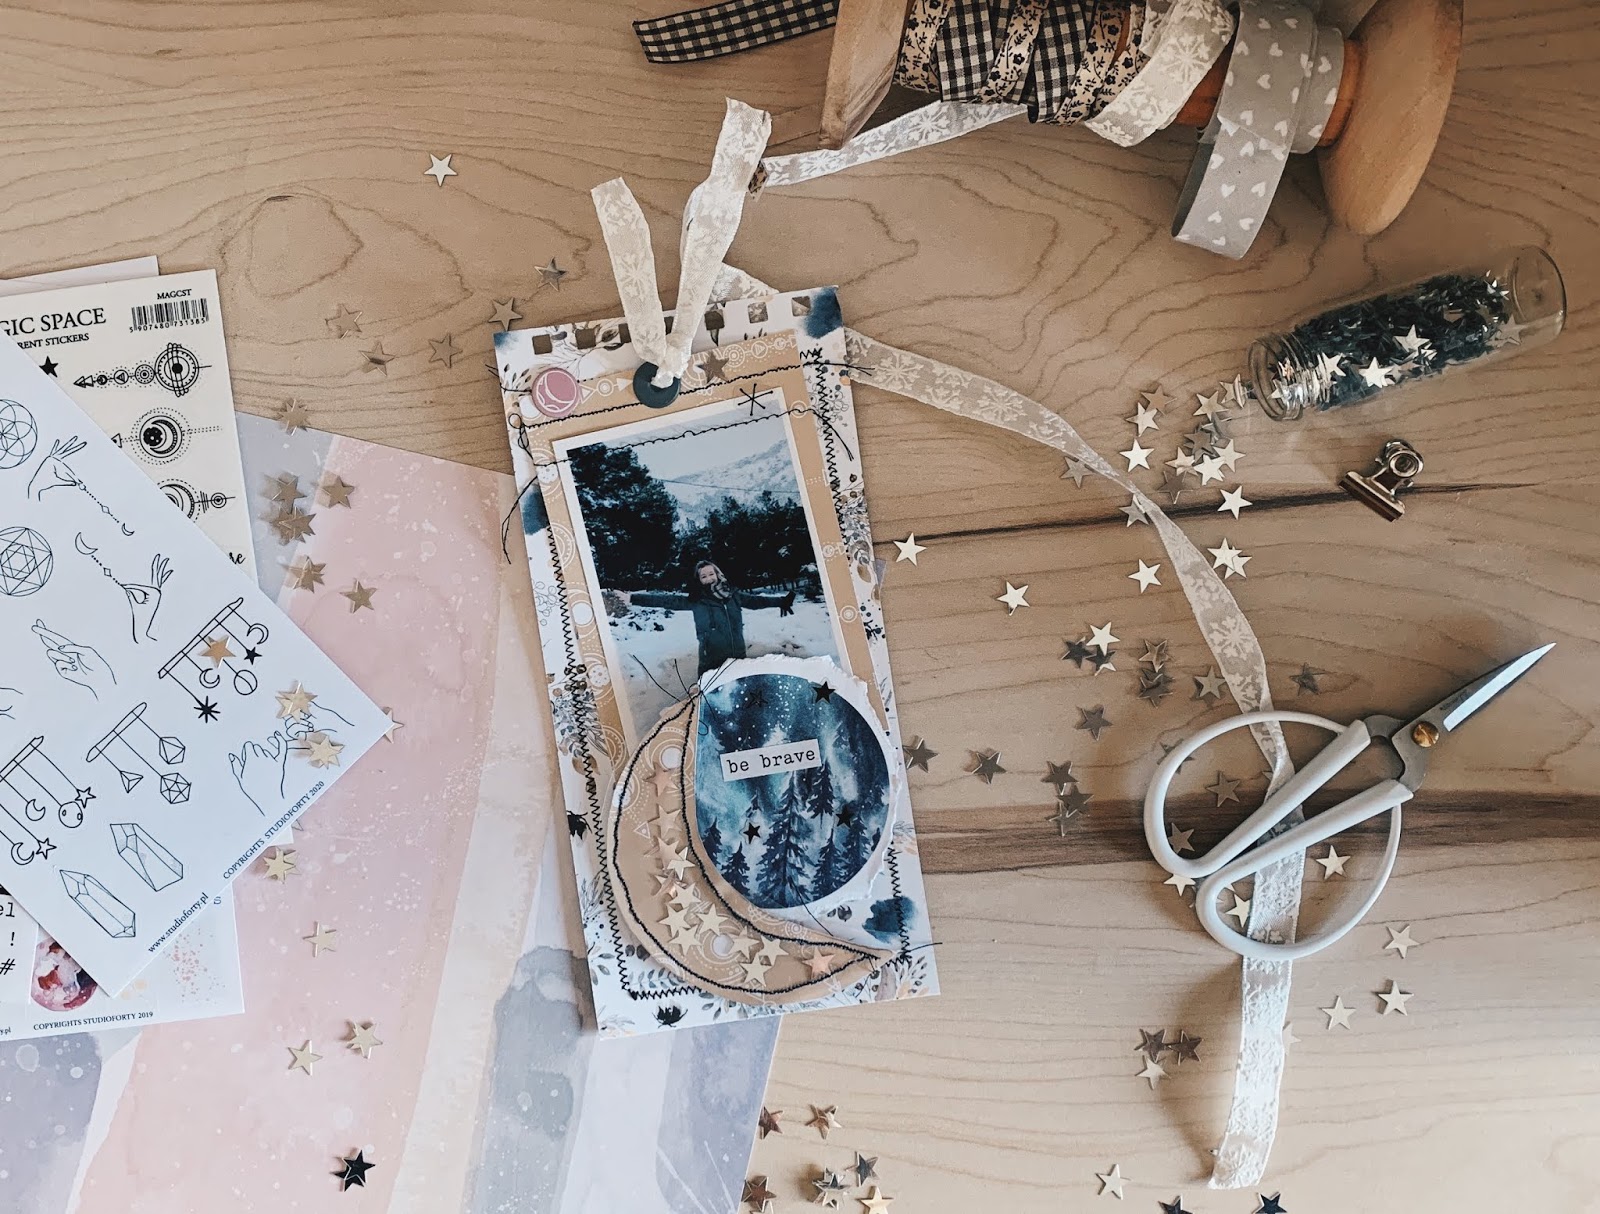
For my moon-shaker, I first cut one in a white paper to see the size I needed,
once I decided, I cut the acetate and the paper I was going to use.
Then I have sewn a first part, I have introduced silver stars and I have finished sewing.
I have chosen a tag from the same collection and I have torn it to give it
the shape I wanted.To
this tag that has been left in a circular shape
and to the moon I have
glued them with 3d adhesive to give the tag a bit of volume.
I
added a picture of a day that I was especially happy, because it snowed
in my city, something that never happens, and to give it my touch,
I
added some stitches with the sewing machine.
At the top, I made a
hole and put an eyelet with the help of my crop-a-tell
and passed a
little ribbon that I had as a house of snowflakes.
To finish decorating it I have put some stickers with text and in the shape of stars.
I
like to store my tags in a filing cabinet with rings so I made some
holes with the cinch,
which apart from being beautiful is practical for
me.
I hope I have inspired you and see you very soon here.
Cattaleia
memory kepping
Hello crafty friends! Vânia here and today i´m sharing some inspiration with the Gaia collection.
Memorydex cards are perfect when you want use your scraps or when you want to make something but you don´t have a lot of time to scrap. So that´s what we are making here today!
First i´ve start by stamping some flowers and leafs, i think they´re perfect for any season and almost any kind project.
I always like to add different layers and volume on my projects, in this card i stick the flower using some foam dots, that way the flower popped up from the leafs.
For this one i made a little envelope and put a little stamped reminder inside. Also use the little heart chipboard sticker to decorate the envelope.
To finish the cards i add a little dots of color in withe and beige, i think it always give a more finished touch.
And that´s all for today, quick and simple! I´ve hope you find some inspiration to go grab your Gaia scraps and give the Memorydex cards a try! Please tag me on the Social media if you do i would love to see your makings!
The links to all the products that i´m using are below:
album
Hello everyone!
It's Isa and I am glad to be back on the Studio Forty blog with a new project featuring the wonderful collection "Lunare".
This time I wanted to make a different mini album and I used the shape of an enveolpe to make an album.
I made the shape of an envelope with some tempates that I have at home, and then on the inside I cut some papers from the Lunare collection and also a white cardstock to make the pages.
As you open the pages of the album, you can see how they are disposed and you can see different flaps overlapped. It is what I like the most about this kind of structure, that he pages open in different ways and it is like discovering what is next.
Apart from the papers from the collection, I have also used the stamps set and transparent stickers as well as other stickers from other Studio Forty collections. One of the things that I like about all the Studio Forty collections is that you can mix them and combine them very well for any occasion that you want to document. This time, the pictures of my album are pictures that I took from Pinterest. I did not have pictures myself and I wanted to try this new structure so I always take online pictures, they are the best option to try to test new projects or inspirations.
I have combined pictures with blank pages with little decorations so the project can have space and it is not too crowded with pictures.
Here you can see the whole structure that fits inside the envelope. Arriving to the last page, I have made a pocket with it so inside you can find a journaling card of project life from the Lunare collection with another picture.
I decided to use black and white pictures because you can combine them with any colors and I always like using them as much as I can because I think that they add elegance to the projects.
I have cut some moons from a paper from the Lunare collection to use them as die cuts to decorate the album.
I have also cut details from the project life cars from the Lunare collection.
As you can see in the next pictures, you can use the transparent stickers from any collection in all the projects as all the decorations match perfectly well.
To close the envelope I have made holes with my Crop a Dile and then add a string to close it. I have added some decorations and I have made the title with two different alphabets.
This is avery easy structure to make, what you only need is an enevelope as a reference and then let the magic inside go. I hope you like it and that you can use it to inspire yourselves for incoming projects. See you very soon here on the Studio Forty blog.
Kisses,
Isa
2020
Hello !
First, I'd like to wish you a very happy new year !
I made 2 cards with Gaia collection to say "Hello" to 2020 !
Those cards are quite the same, but they're not done with same papers and coulours ;-)
It gives 2 differents atmospheres:
The first one is natural with
kraft / white / gold
And the second one is spring:
green / white / black / gold
See you soon !
Gwen
chipboard
Hello everybody!
This is Isa and today I'm going to present you my first project made with the Lunare collection. I am thrilled to be back here with this project because it is very special for me and also I have to say that I am completely in love with the Lunare collection.
For this project I have used a wooden clipboard from Projekt Planner and I have decorated with a picture as if it were a layout.
First, I painted the clipboard with a grey paint that I created mixing black and white acrylic paints. Then, when it was dry, with some white spray I added some drops of white paint to make it look like a galaxy.
I cut some planets from one of the TN inserts of the collection. As they were smaller than the ones in the 12x12" paper they fit better in the size of the clipboard. I glued them in the clipboard, but before I did some shadows for the planets with a white gelatto.
Behind the picture, I have added several layers. I have used some pieces of cloth that I had at home that matched perfectly with the colors, vellum and papers from the Lunare collection. I sewed them irregularly and placed them behind the picture with some volume.
I used also chipboards from other Studio Forty collections, and some other decorations.
The picture is me and my sister's dog which I love very very much! I added as a title the word DREAM in white foam and in the clip I added a scrap of paper with a sticker from the Lunare collection.
I hope you like the project and that you try to alter some objects to create beautiful scrapbook projects. I really love converting clipboards into beautiful decorations to put at home!! See you really soon! Lots of love,
Isa
.png "Menu")