Pokazywanie postów oznaczonych etykietą So Romantic. Pokaż wszystkie posty

Ślubny mini album

agnieszka damska


Cześć, z tej strony Agnieszka i mam dziś dla Was coś wyjątkowego - ślubny mini album!


Do stworzenia tego projektu użyłam idealnej na takie okazje kolekcji SO ROMANTIC. Album ma format 10x10cm, zawiera 12 kart oraz wiele otwieranych zakładek, co starałam się pokazać na zdjęciach. Na ostatnim zdjęci widać sposób łączenia kart.


W projekcje znalazły się moje ulubione stemple i naklejki z różnych kolekcji, oczywiście pasujące do tematu albumu. Część stempli stemplowałam bezpośrednio na kartach urozmaicając tło, część na białym kartonie, po czym je wycinałam i podklejałam tekturkami.


Bardzo fajnie komponują się elementy stemplowane w połączeniu z wyciętymi motywami roślinnymi z papieru. Do stworzenia takich ozdób użyłam m.in. stempli z zestawów: "Together forever", "Bloom",  "Happiness" czy "Fall flowers".
 

Lubię robić w takich albumach różne zakładki, schowki czy rozkładane strony, które sprawiają, że album staje się ciekawszy. Mogę w ten sposób zamieścić większą ilości zdjęć, bez efektu przeładowania.


Myślę, że taki mini album to fajny prezent i świetna pamiątka wyjątkowego dnia. I mam nadzieję, że Wam się podoba, bo mam jeszcze do pokazania trzy mniejsze wersje dla córek przyjaciółki. 


W projekcie korzystałam z:


oraz stempli:

Bloom -zestaw stempli do scrapbookingu/  stamp set#166 Happiness - zestaw stempli do scrapbookingu/ stamp set#164 GRATULACJE- zestaw stempli do scrapbookingu/ stamp set#173 

SUPER COOL - zestaw stempli do scrapbookingu/ stamp set#171 Lovely day- stamp set#150 Fall Flowers -  stamp set#96 

Together forever- stamp set#136 Magic - stamp set #78 


        Floral Layout | Elena La Scrapperia

        chipboard stickers
        Hello my friend, it's me, Elena!
        And today I want to show you a super floral layout made with only one sheet.. a lots of patience 😂 and a good pair of scissors 😜
          

        To be honest, I love to crop because relax me. For this project I used one sheet of paper by SO ROMANTIC Collection and lot of stamps.


        With black ink I created a lot of spots for give more dinamicity and I finishing with a small leaf on background. On in my layouts they cannot be missing lot of die cut and chipboard!

        Here is the list of the material I used:

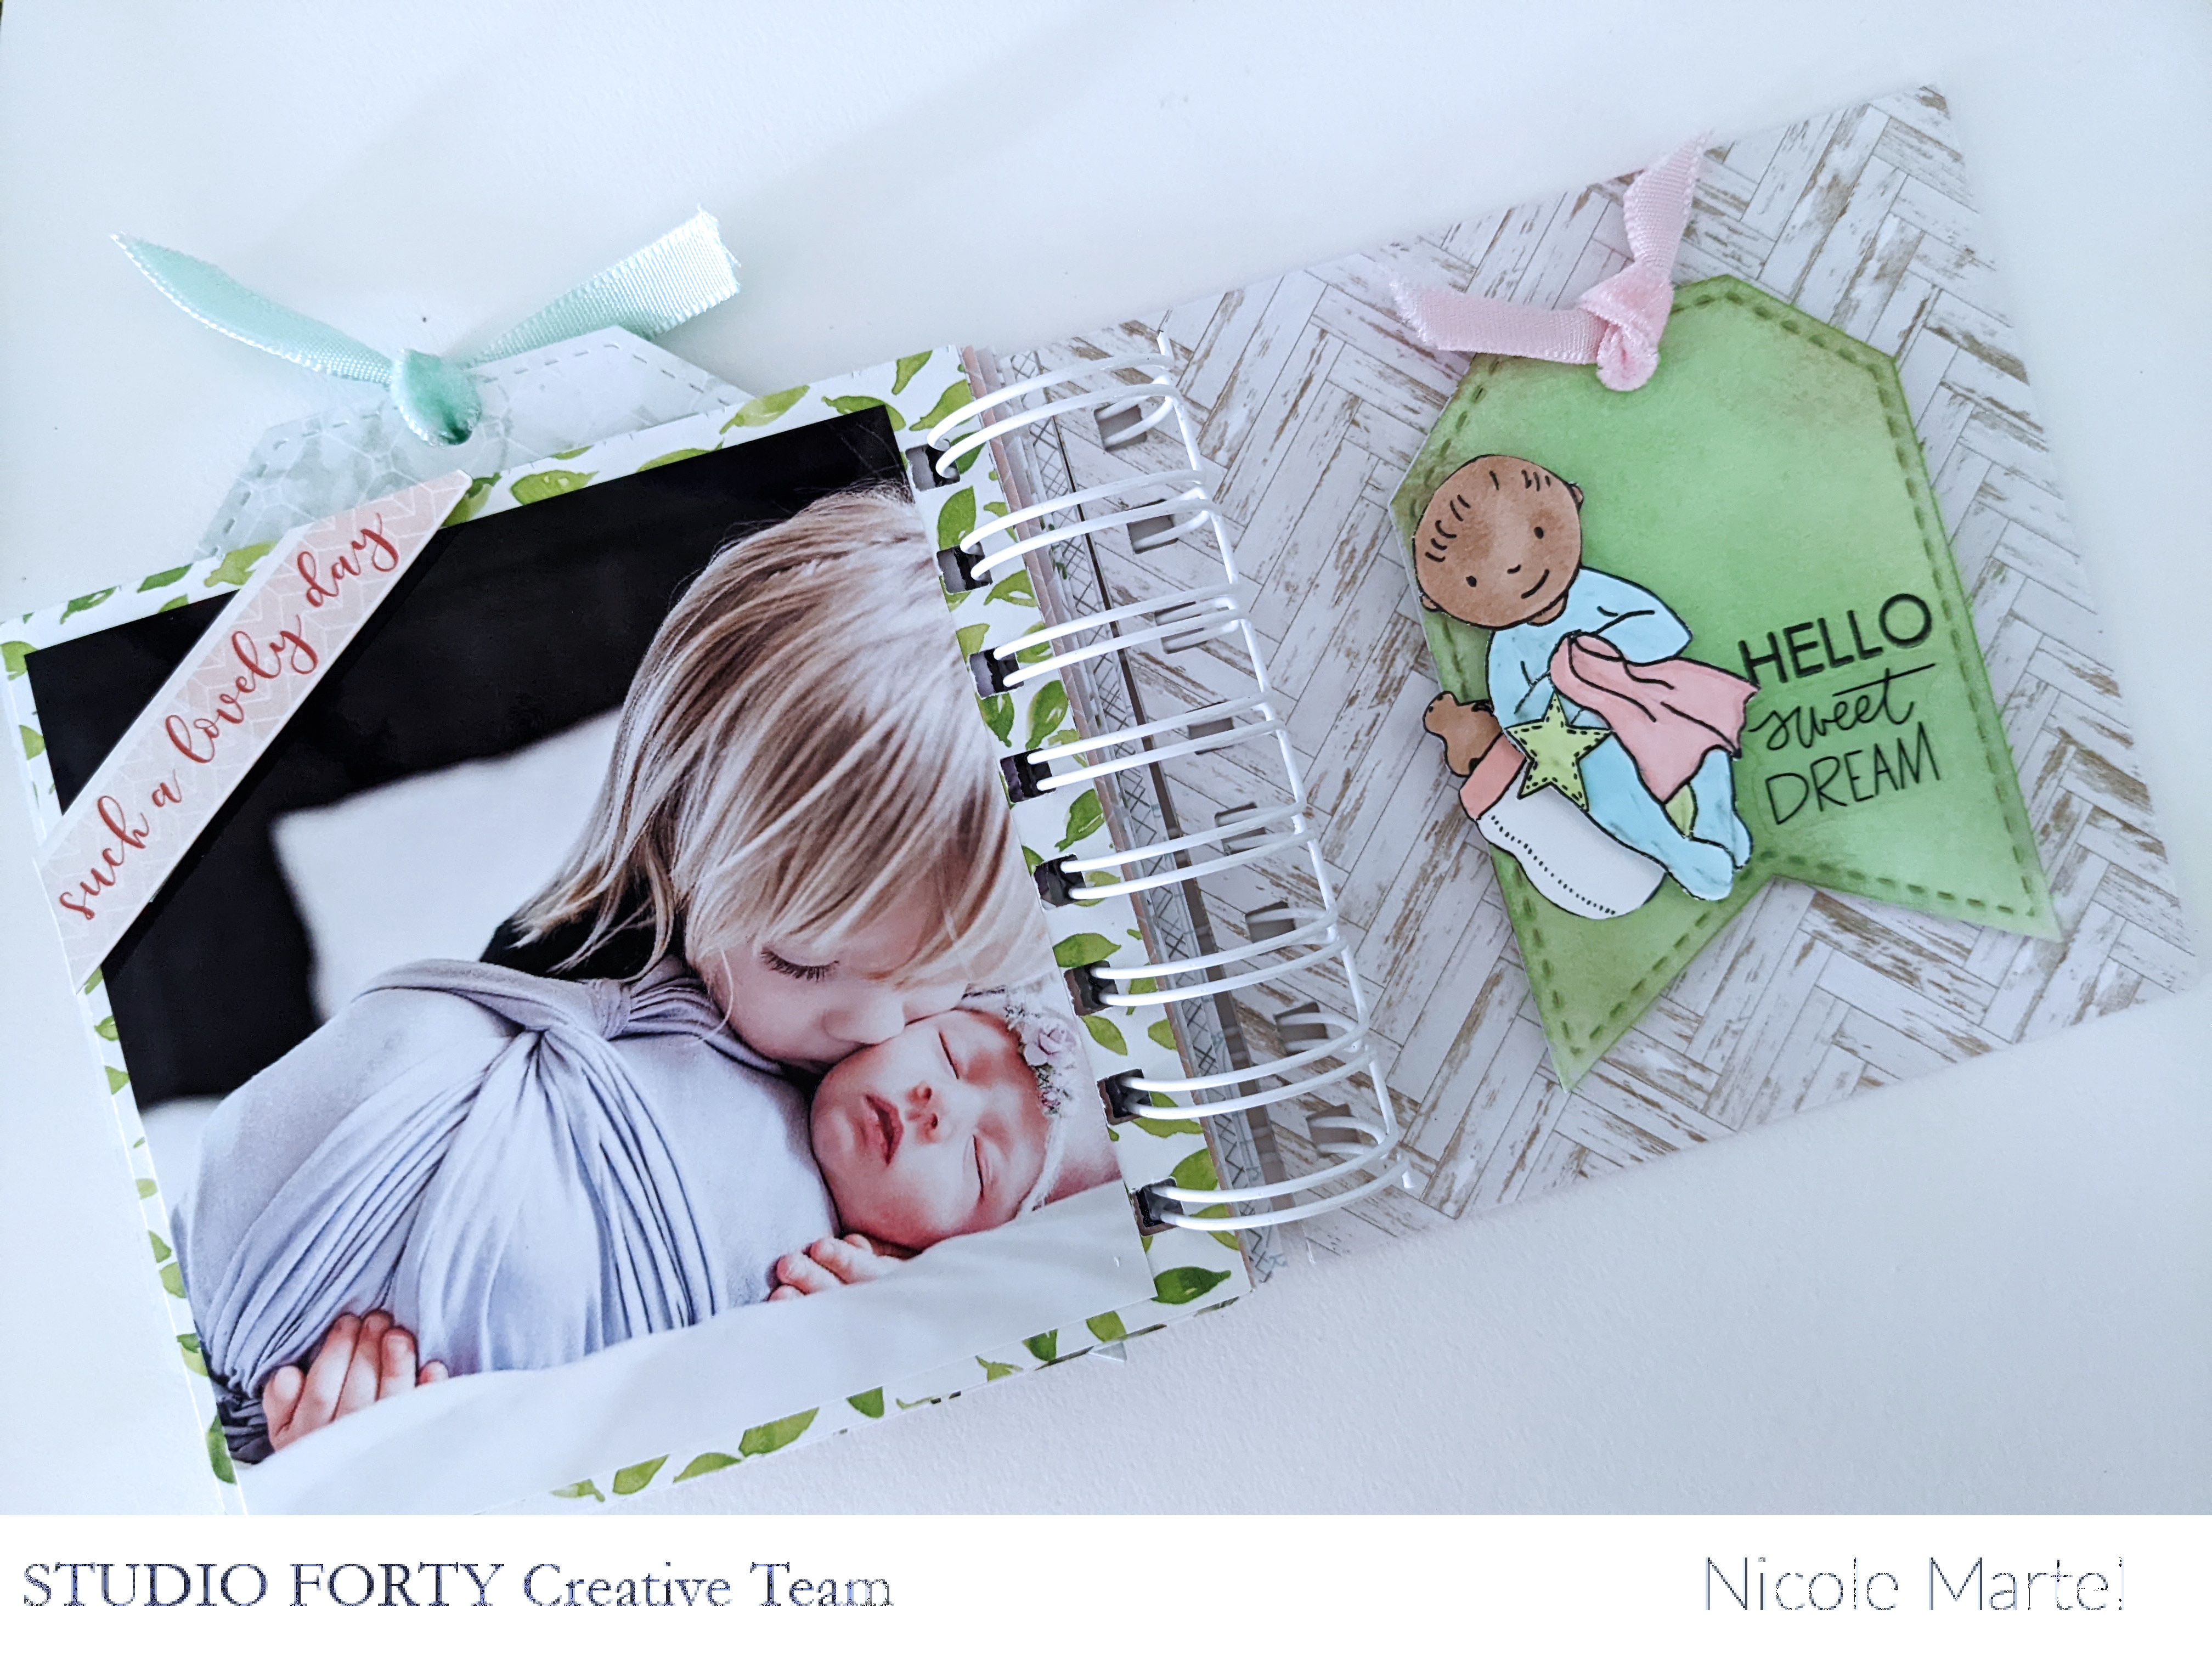
        Everyday Life Mini Album/Nicole Martel

        daydream collection

        Hello, friends! I have an adorable mini album to share with you today. My sister just had her baby and pictures taken so I put together this simple, but beautiful mini album for her!


        To begin, I printed several photos and cropped them to measure 4"x4". Then, I cut a variety of patterned paper to measure 4 1/2"x4 4/2". Next, I selected the embellishments I wanted to use from a variety of collections. 


        I mounted the photos to the pages and then I used my Cinch to bind the pages together. I decided to use a 1" coil, rather than a smaller coil because I knew that by the time I finished this adorable mini, it would be a little bulky from the embellishments.

        I covered two pieces of chipboard with patterned paper for the front and back cover of the album so that the outer layer isn't too flimsy.


        Next, the fun part! Adding all of the beautiful embellishments to the album. This was my favorite part. It's always fun, playing with the embellishments in my stash! I tried to use things I've had for awhile...stash busting. All of the products are still available in the shop except for the die cuts.

        I kept this album pretty simple, keeping the focus on the adorable photos. I think I added just the right amount of embellishments, without overdoing it.

        You will notice, I follow the same design/format throughout the album. Embellishments on the left side of the album with the picture on the right side with a small amount of embellishments here and there to add dimension.

        I love playing with chipboard frames. They are great embellishments. I used a few here with the chipboard sentiment layered. This was a happy mistake! I smudged ink on the photo and needed to cover it!

        You may have seen my previous post on how I created this cute tag from the Never Grow Up stamp set. If not, click here to see how I made the tags in this mini! I told you they were going to be used in my next project. :)

        I used foam squares to adhere the chipboard onto the photo and then cut the arrow from the chipboard frame.

        Love the pop of green on this spread with the touch of pink! Isn't this the cutest picture you ever saw?!

        Here's the cover. I used clear transparent stickers with a chipboard piece to complete the cover. Super simple. 


        Thank you so much for visiting today!


        Autumn layouts | Yukie Bessho

        12x12 layout


        ***

        Hello everyone! 

        Hello September! 
        SO, have you seen them???
        Studio Forty has released beautiful new autumn/winter collections!!

        Before sharing my projects with new collections, 
        I would like to show you some
        Autumn layouts with my favorite collections from the past, today.

        The first layout I have mainly used GAIA collection’s travel note pack. 
        TN paper packs can also make 12x12 layouts! This is a good example of that. 
        Do you call it a blocking layout still? I am not sure…. 
        But it’s very simple and easy to make. 

        I wrote 'Hello Autumn 2016' by my hand on to the cut out from the journal card of the Travel note!


        I did some 'pen stitches' and 
        used some stamps to show some accents for stitching, Also the subtitles. These stitch stamps are very very handy. Must buy if you have not. 


        Maybe the journaling was a little different, as you see I wrote in my language Japanese.  But surely it dies the same effect in any languages. 
        The gems I have cut out from the travel note paper and placed as if they are hanging, using  the same stitches stamp. 


        Used some pens for accents. But you need nothing so special.
        Just one plain 12x12 cardstock or simple pattern paper, and the Travel Note pack!
        Oops, do not forget the Studio Forty unique stamp set!


        ***


        My second layout is from some collections in the past. 
        Lunare collection, CozyTime collection, and white card stock. 
        The enamel dots did great accent to the piece. 
        I also used 'Hello Beautiful' from the die cut pack.


        So this is it for today.  I hope you liked both the projects. 
        Thank you for staying with me until the end. 

        Next time, I will see you with Studio Forty's latest collections!!
        Bye for now!


        <The Gaia collection project>
        Gaia Collection TN pack → Click here
        Cozy Time collection paper → Click here


        <Lunare COllection project>
        Lunare collection paper  Garden Magic→  Click here
                      Star trails→   Click here
        Cozy Time collection paper → Click here
        Day Dream enamels → Click here
        Die cut pack from So Romantic collection → Click here