Pokazywanie postów oznaczonych etykietą scrapbookideas. Pokaż wszystkie posty

Little box with Magic Garden | Bihotzez Scrap

bihotzezscrap
Hi everyone! Here I am again, how are you? Have you had a happy Easter? I hope so!

Today I come to show you this little box that I have made with the new collection Magic Garden.


I have used the large collection (to make the exterior) and the small collection (to make the interior). To make the structure I used a white cardboard.
 

To decorate the exterior I have used some of the cutouts from the small collection. I added some yarn to give it a different texture. 


I also used the dots from the collection and as a title, I used a word from the "Vintage Glow" collection.


I made this box to store all my cards. I really like to save cards from restaurants that I like, but I have several types of cards so I made dividers to keep them organized.


To make these dividers I used the cards from the collection (but I had to make them smaller). Then I put a clip on them and attached a cutout to it.


Now I have all my cards organized in my box! What do you think? Do you like the idea? Where do you keep your cards?

I hope this box serves as inspiration for your projects. 

See you son!

María.


Mini Album with Spring Time | Bihotzez Scrap

bihotzezscrap
Hi guys! This is María again, how are you? Hope you had a great weekend!

Today I come to show you this mini album made with Spring Time collection.


The album measures 14.5 cm high and 10 cm wide. These papers are perfect because they measure 10 cm wide like the album, so you only have to cut the height! Also I used the enamels from the collection.


 To make the loin I used the stamp xoxo. The measurements are 3.5 cm wide and 14.5 cm high.


To decorate the interior I used stickers, enamels, xoxo stamps and spring vibes stamps. Also I also put some coiled threads, I love this effect!


With papers from the collection I also made cards, perfect for writing or putting photos. In total I made three pockets, which give the album more capacity for documenting.

I hope this little album can inspire you in your creations!

If you like those materials you can find them in the Studio Forty web and using the code MARIA10 you will have a 10% discount.

See you the next time!


Mini Album | Bihotzez Scrap

bihotzezscrap
Hi guys! How are you? I am María and today I come to show you my first project as DT of Studio Forty. I am very happy to be on this team!
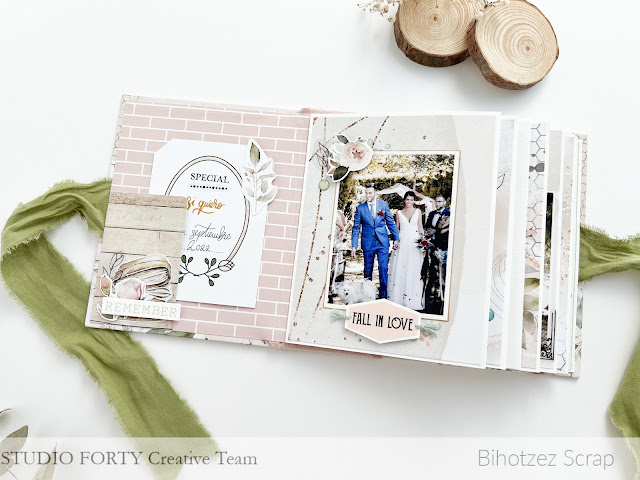
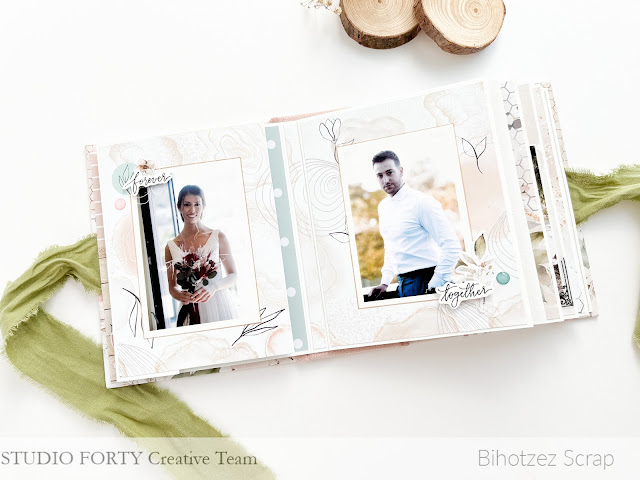
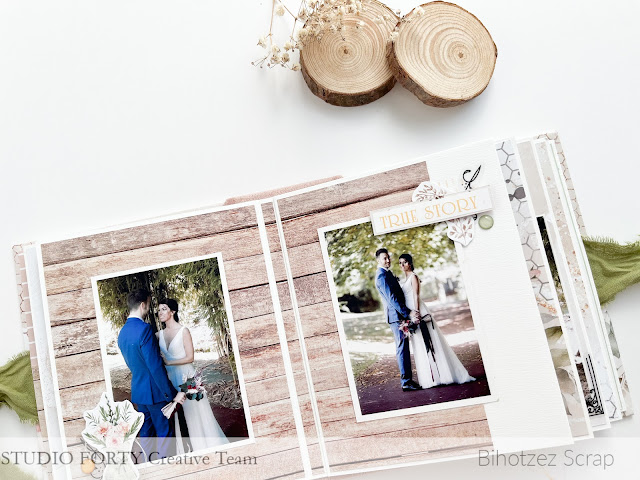
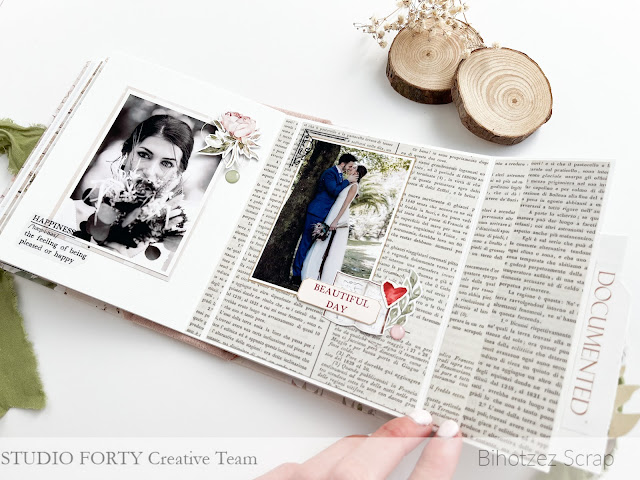
My first project is an album made with the new Vintage Glow collection. As soon as I saw the collection, I thought to make a mini album to document some photos of my wedding. I was married last year and I haven't made any album yet.


I think the colors are perfects with the colors I chose for my wedding: light pink, green, brown, beige... It is a super soft and elegant collection.


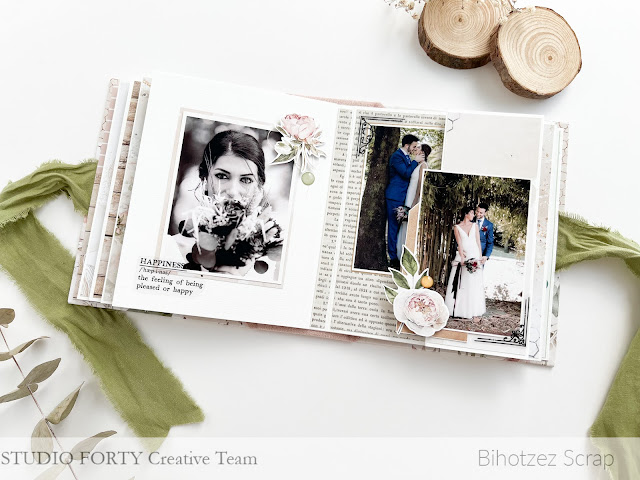
The measures of the album are 12cm x 15cm (I already told you it was mini hahaha). I have made a U-shaped binding with three booklets glued one on top of the other. In total it has 6 pages, and although I have not made pockets because I did not want to saturate it with many photos, I have put 16 photos. It was a hard work choosing which ones I wanted to put!


I have used all the types of decorations that the collection brings, they are all so pretty! Enamels, shape stickers, phrase stickers, color stickersdiecuts, stamps... There are a lot of elements to decorate!


I really liked the stamps to create a kind of base on which to put the rest of the decorations. Another thing I loved are the definition stickers. But my fovorites are roses die-cuts


I really like using thread in my albums to decorate. I think it gives it a special touch, right?


I really liked the transparent stickers with definitions. It gives the photograph a different meaning because it helps you to describe the feeling.


I really like the result of the album, I think the photos and the collection make a great tandem! Don't you think?


I hope you like it as much as I do.

I would like to remind you that you have all the materials on the Studio Fory website. Also, if you use my code MARIA10 you will have a 10% discount.

See you in the next post! 


Podręczny zestaw TN | Anna Kaczmarek

Aka
 Hej,
tu Ania.
W tym poÅ›cie pokażę Wam, 
jak w prosty sposób można zrobić sobie zestaw podróżny,
 w którym można przechowywać lub przewozić notes,
 bloczek papierów, naklejki lub karty do pocket scrapbooking'u.


WykorzystaÅ‚am do tego pudeÅ‚ko rozmaru 11 x 22 cm, czyli takie, 
które zazwyczaj wykorzystuję do wręczania kartek formatu DL.


Wierzch pudełka ozdobiłam jedną z kart do pocket scrapbooking'u,
oraz wycinankami grafik, które możecie znaleźć 


Pudełko mogłam pozostawić w wersji pierwotnej, czyli osobne górna i dolna część,
ale postanowiłam je połączyć, aby otwierało się jak książka.


Z lewej strony przymocowaÅ‚am dwa kawaÅ‚ki gumki, 
pod które można wsunąć karty lub zdjÄ™cia 
i być pewnym, że przy otwieraniu nie wypadnÄ….


W prawej części można zastosować tę samą metodę,
ale ja w tej części bÄ™dÄ™ przechowywać notesy 
i papiery formatu 10 x 21 cm, czyli te idealnie pasujÄ…ce do TN.
W środku zmieści się także coś do pisania lub rysowania.


A Wy jak przechowujecie albo przewozicie swoje podróżnicze notesy?


Kartki ze stemplami | Anna Kaczmarek

Aka
 Hej, tu Ania 
i zaglÄ…dam do Was z kartkowymi inspiracjami z najnowszej kolekcji.
Trzy kartki są niby podobne, ale każda jednak inna.


Na tej pierwszej kartce napis zrobiłam z literkowych naklejek w kolorze różu.
Litery nakleiÅ‚am na białą tekturÄ™, a potem każdÄ… wycięłam, 
zostawiając wokół naklejki niewielki margines.
Litery podkleiłam kosteczkami dystansowymi, żeby lekko odstawały od tła kartki.


Na tło wybrałam papier akwarelowy, który jest w lekko kremowym kolorze.
Na każdej kartce ten papier akwarelowy pochlapaÅ‚am 
oraz zrobiłam na nim odbitki motywu kwiatowego z zestawu OH FLOWERS.


Na poniższej kartce odbiłam stempel z zestawu GRATULACJE
na prostokÄ…tnym kawaÅ‚ku papieru akwarelowego, 
który potem nakleiłam na kolorowy papier z najnowszej kolekcji.


Odbitki stempli kwiatów kolorowaÅ‚am kredkami akwarelowymi 
na papierze akwarelowym,
 a potem nakleiÅ‚am na papier kartonowy i wycięłam.


JeÅ›li jednak nie masz czasu, lub nie lubisz kolorowania stempli, 
to spójrz na poniższÄ… kartÄ™. 
Czarne odbitki na białym papierze też będą ciekawie wyglądać.

Ale u mnie te białe kwiatki to wycięte elementy z papieru
znajdziecie je na formacie 30x30 cm, 


Zachęciłam do kartkowania? :)