clear sticker
Hej!
Witajcie we wtorek z naklejkami! Zaraz zobaczycie, że w mojej inspiracji użyłam ich naprawdę słuszną liczbę. Dziś chcę się z Wami podzielić moją inspiracją - przygotowałam exploding box.

Zanim zajrzymy do środka chcę Wam trochę opowiedzieć o tym projekcie. Do jego stworzenia użyłam papierów z kolekcji
LET'S RELAX i całej masy dodatków. Każda ścianka pudełka to osobna kompozycja, w których jednak jest kilka spójnych elementów: biały papier bazowy, przerwany papier scprapowy i tekturka falista.
Wprawne oko dostrzeże również, że użyłam transparentne naklejki z arkusza
LATO CZEKA.
To, co według mnie najważniejsze w każdym exploding boxie to element, który umieszczamy na środku pudełka. Nierzadko wybranie go sprawia mi trochę trudności. Tym razem jednak do stworzenia tej pracy zainspirował mnie właśnie ten element. Powstał oczywiście z papieru scrapowego... wykałaczek i sznurka!
Tak! To namiot tipi. Uważam, że ten element pasuje tu idealnie. Sama chętnie bym się w nim schowała, chociaż na kilka chwil. W końcu jesteśmy na półmetku wakacji (a ja wciąż przez urlopem). Rzućmy jeszcze okiem na moje pudełko z lotu ptaka.
Mam nadzieję, że moje pudełko Wam się spodobało. I cóż, czekam na wasze prace inspirowane letnim exploding boxem!
Pamiętajcie, że w
NASZYM SKLEPIE trwa promocja! Możecie zrobić zakupy z
15% zniżką. Dodatkowo użyjcie kodu
paulina10 i sprawdźcie co się stanie.
Pozdrawiam Was serdecznie!
6inches
Hello Studio Forty fans!
I would like to share my 6x6 layouts with the latest collection: Here and there.
Yess! I have made three pieces with Here and there.
I have used some stamps from Studio Forty's summer inspired stamps every where on the base paper. That was a fun job.
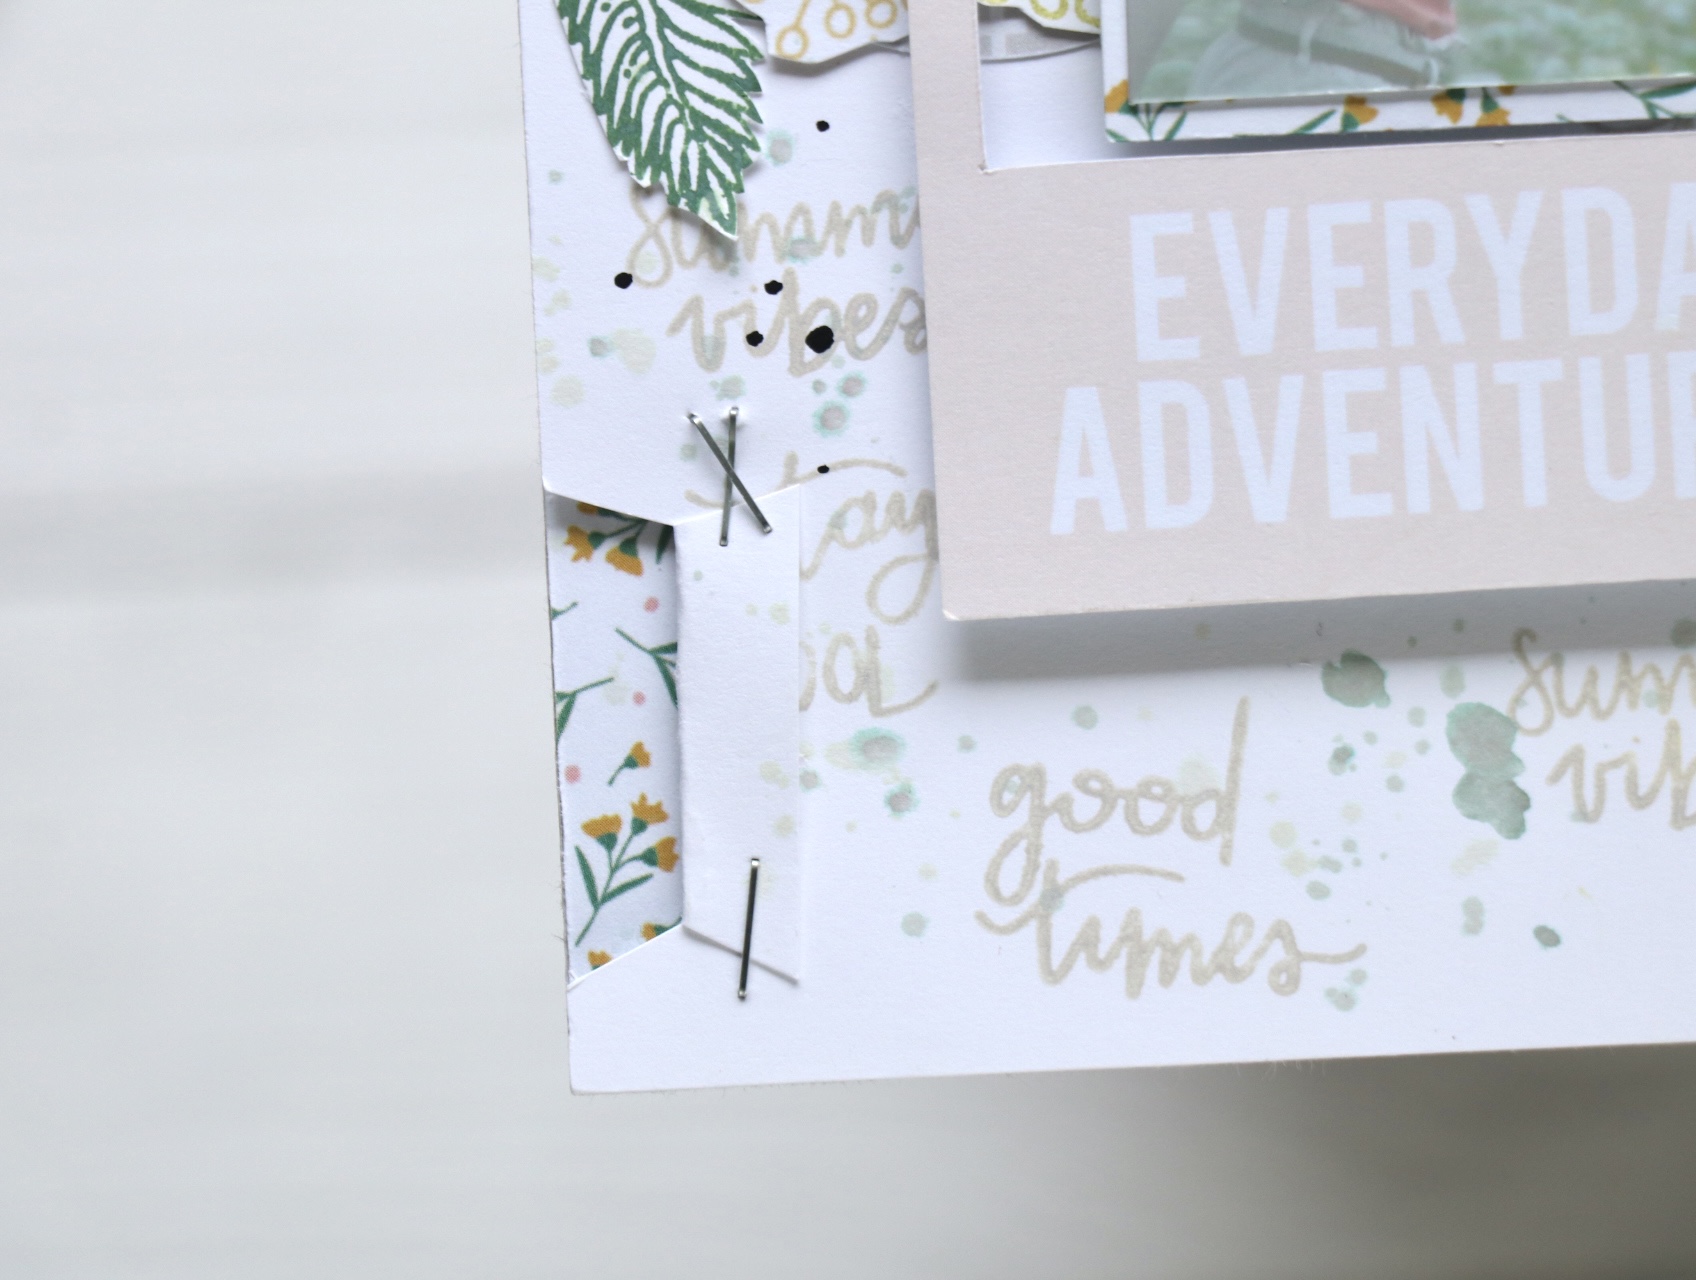
The first layout, I have stamped sentiments from the stamp #92.
Then stamped #140's some leaves and cut them out. Also some botanical patterns from the TN paper pad and adhered them on line, placed the photo, frame, and some dots.
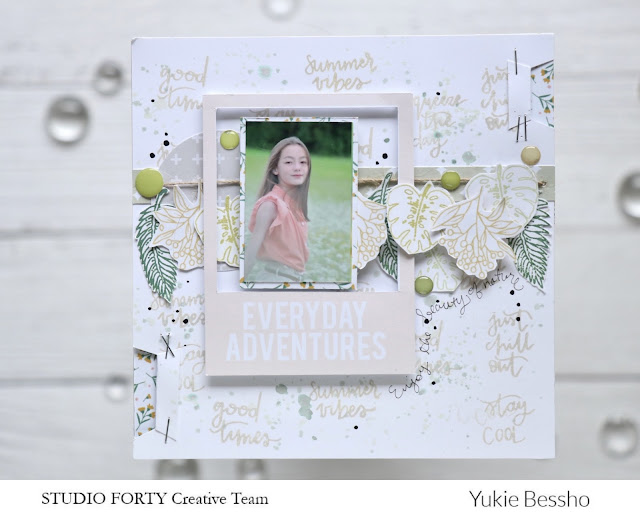
I have spattered some water colors, black acrylic paint, and did some cut on the edge, folded, and stapled it, for a fun inspiration.
Second layout is with more colors.
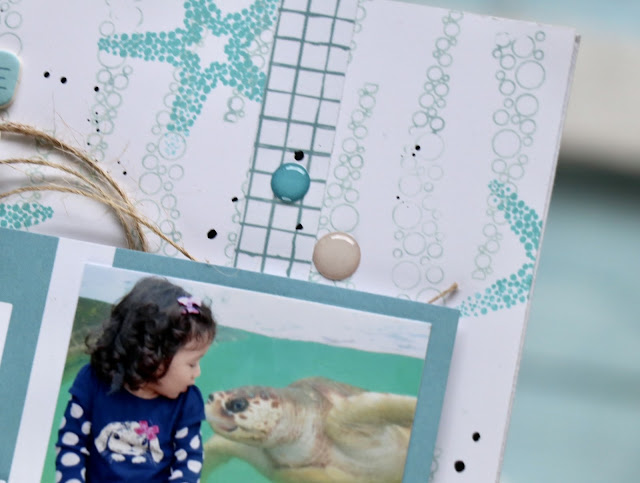
I have used some from the journal card set, die cut elements, TN paper pack, Chip board stickers, enamels, circle sticker and stamps.
Stamps, I have placed the bubbles, and the star fish everywhere.
The TN card, I have cut
2 stripes in half inches and crossed them.
Teared the sides to show some distressed inspiration.
*****
The third layout is full of fun. I have stamped some leaves, and cut them out, I have water colored, let it dry, and placed the transparent stickers, then cut them out.
I have also adhered some die cut elements and some chipboard stickers to make a wreath around the photo.
To finish the layout, I did some acrylic paint (black and white spatter.
Transparent stickers are fun. You can actually color it with like alcoholic inks, or just like this case, water color plain white cardstock and you can over ray it.
I hope you liked all three layouts.
6x6 is so quick to make and yet you have so much to do. Great gift to your friends and family!
See the whole Here and There collection →
Click here
See you next time!
xo Yukie
Bom Dia
Hello, today I, Sonja, can show you my latest project with the lovely summery collection BOM DIA.
For my Project Life album I am currently mostly designing a double page and you can see the most recent one today. The papers in the collection are so fresh and delicate, which is why I decided not to use my beloved white cardstock as a background.
I printed the pictures for my layout directly as strips on my printer at home, as well as all the other pictures on my both pages too.
As a decoration for both pages, I practiced patience and diligently cut out flowers, cameras and leaves from a sheet of printed cardstock, but I think the effort was worth it, because everything fits together perfectly.
I then just deposited the photo with transparent parchment, you don't have to cut it out with scissors at all, just tear it off. That gives a nice structure.
I punched out the letters for the title with a few older letters, but this time on a white cardstock. With a circular punch, you can quickly punch out additional embellishments that loosen up the layout.
I hope I was able to give you a little inspiration and hope you enjoy copying and have a good time.
Bom Dia
Hello everyone! I’m here with another Traveler's Notebook inspiration as I promised. I made a few new pages from our last year's summer holiday using the BOM DIA collection. This time I used the TN papers and of course lots of stamps as I love using stamps in my Traveler's Notebooks. And I'm looking forward to going on another cycling holiday this year. Yay!
So let's see how my other pages look like. I follow the whole pattern of this TN - I use washi tape on the top and on the bottom. On the first page of another day I used only one photo, because it's precious to me. Our son loves animals and he just couldn'd let this cat down. I also created a sort of a stamp cluster using the word "sweet".
Next page is about animals again. We visited a private ZOOPARK and I was amazed how great it was and how beautiful animals we saw. We donated the ZOO and I bought an extra ticket for my son so he was allowed to feed the big Ara parrots. That was just incredible. And to be honest - at the beginning I was a bit scared (and so was my son), but he enjoyed it a lot.
Besides the two photos I used lots of pictures from the ZOO booklet. I added a PL card and a TN paper as a background and used some stamps.
For my next two pages I used the same background papers as the story takes place at one place. Did you ever realized that kids are a bit afraid of natural ponds and lakes as they are use to swimming in clear swimming pool's water? I did ... and it was fun. Again I added a few stamps and created a sign using one of my die cuts. I actually die cut two layers - one from white textured cardstock and one from one of the TN papers. So it looks like a letters with a bit of a shadow.
I love this page! I took like a hundred of photos of our kids in this field and this is the only photo where every each of them smile and don't have their eyes closed or look somewhere else. So I just had to scrap it separately as one page. I cut two of TN papers into triangle shape and added some stamps and embelishments.
So I managed to finish two more days in this TN and I have two more to go. Hope you remember to take lots of photos during your holiday as photos are the key. Have a great day!
Products I used:
12x12 layout
Hi crafty friends!
How has been your summer? It’s slowly but surely coming to an end,
however, I have prepared two summer layouts from the Beautiful Life
collection.
.png "Menu")