Pokazywanie postów oznaczonych etykietą daydream. Pokaż wszystkie posty

Autumn layouts | Yukie Bessho

12x12 layout


***

Hello everyone! 

Hello September! 
SO, have you seen them???
Studio Forty has released beautiful new autumn/winter collections!!

Before sharing my projects with new collections, 
I would like to show you some
Autumn layouts with my favorite collections from the past, today.

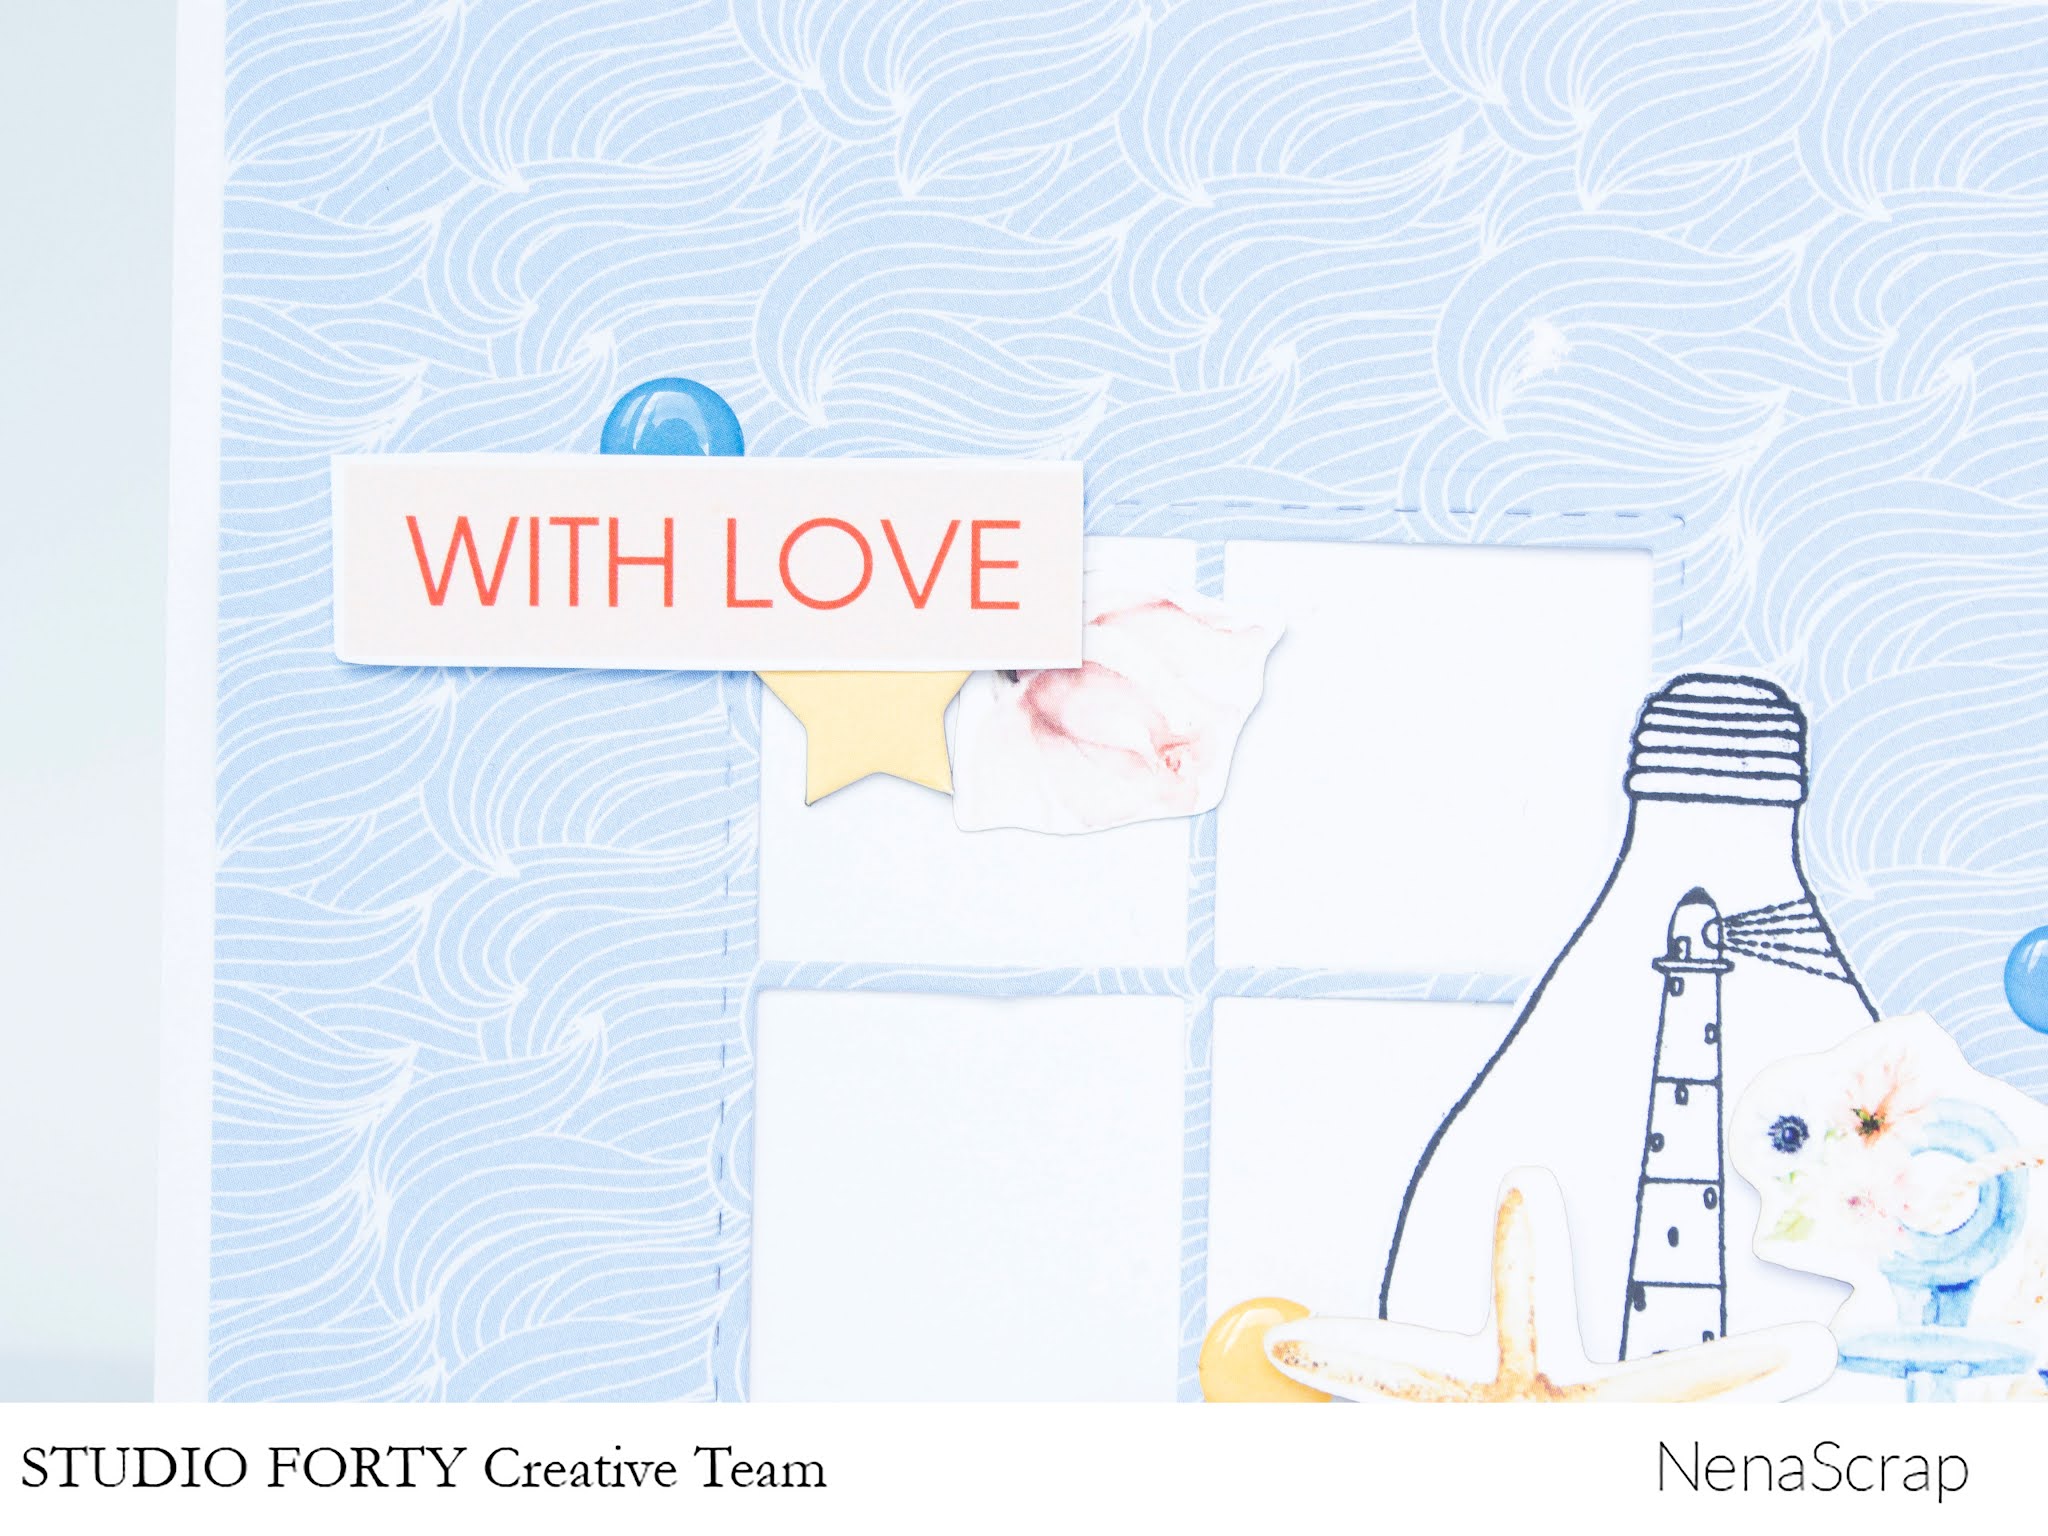
The first layout I have mainly used GAIA collection’s travel note pack. 
TN paper packs can also make 12x12 layouts! This is a good example of that. 
Do you call it a blocking layout still? I am not sure…. 
But it’s very simple and easy to make. 

I wrote 'Hello Autumn 2016' by my hand on to the cut out from the journal card of the Travel note!


I did some 'pen stitches' and 
used some stamps to show some accents for stitching, Also the subtitles. These stitch stamps are very very handy. Must buy if you have not. 


Maybe the journaling was a little different, as you see I wrote in my language Japanese.  But surely it dies the same effect in any languages. 
The gems I have cut out from the travel note paper and placed as if they are hanging, using  the same stitches stamp. 


Used some pens for accents. But you need nothing so special.
Just one plain 12x12 cardstock or simple pattern paper, and the Travel Note pack!
Oops, do not forget the Studio Forty unique stamp set!


***


My second layout is from some collections in the past. 
Lunare collection, CozyTime collection, and white card stock. 
The enamel dots did great accent to the piece. 
I also used 'Hello Beautiful' from the die cut pack.


So this is it for today.  I hope you liked both the projects. 
Thank you for staying with me until the end. 

Next time, I will see you with Studio Forty's latest collections!!
Bye for now!


<The Gaia collection project>
Gaia Collection TN pack → Click here
Cozy Time collection paper → Click here


<Lunare COllection project>
Lunare collection paper  Garden Magic→  Click here
              Star trails→   Click here
Cozy Time collection paper → Click here
Day Dream enamels → Click here
Die cut pack from So Romantic collection → Click here
 

Vellum Layout and 6 inches | Yukie Bessho

6inches


 Hello everyone!

How are you doing with your crafty hobbies?

I have been quite busy working with papers . 

And I have to tell you these crafting time is such joy to me. 

***

Here today, I would like to share some layouts I have made with 6x6 inches paper pads and also a sheet of vellum.


First two are the 6x6inches layouts. I have used  Day Dream collection. This collection is great. Beautiful designs and colours. 

I have used some stamps from Lunare collection, too. These stamps made the layout a lot more special and I loved how they effect.


***


Here is the layout with vellum paper.  This one is 12x12 inches. 

Patterned papers are  from DayDream collection. I drew leaves by Kuretake Mangakapen.


These photos are from cherry picking. I wanted to place close-up cherry photo, too. But it looked too bright red and did not match the layout so I gave up , and placed some enamel dots and one sticker of cherry. Vellum is very fragile so I have adhered the whole layout on a plastic sheet. 

Hope you liked them all!


Day Dream 6x6 paper pad →Click here

Lunare stamp →Click here

Vellum sheet →Click here


Thank you for staying with me till the end. 

Until next time, stay safe and enjoy crafting!

xxx Yukie


SUMMER CRAFTS | NenaScrap

daydream
Hi Studio Forty friends,

It's NenaScrap here with you today !

I propose you a layout with the 15x15cm paper pads Day Dream and So Romantic.


I cut out tags in my papers with dies then I assembled them under my photo.


I added volume under some of them with adhesive 3D foam.


I stamped some butterflies with the Adventure Awaits stamp set on my background.


I fussy cut some butterflies from So Romantic paper pad and I added die-cuts, dots and chipboard stickers as embellishments.


I have fun creating different projects with these paper pads so I have made a card.

It's very easy to add embellishments with stamps and die-cuts !


I hope these projects will inspire you to create layout or card.

See you soon with new creations.

XOXO


SUMMER PROJECTS | NenaScrap

Bom Dia
 Hi Studio Forty friends,

It's NenaScrap with you today ! 
I wanted to share with you some summer projects made with the new summer goodies.

My 1st project is a layout made with Day Dream 15x15cm paper pad.


On a white carstock as a background, I arranged 8 Origami hearts made with the printed papers of the Day Dream paper pad. As the papers are squares, it is very easy to fold it to make the hearts (I found the tutorial on You Tube).


I divided the hearts in roughly symmetrical way, leaving a space  to add my photo on the left.


I added several layers of cardboard under my photo to give it volume and assembled some So Romantic die-cuts to create my embellishments and title.
I fussy cut some flowers from the additional paper pattern on the back of the cover in the paper pad.


I made a few splashes with black ink and stamped little leaves, from Thank You stamp set, under my embellishments.
To finish, I added some Day Dream dots .


Here is the finished layout, I hope you liked this way of using our papers differently.


For my 2nd project, I wanted to use vellum paper. I decided to include some in my traveler notebook documenting our trip to Sevilla in 2019. 


I chose the So Romantic vellum . I create a flap on the right page and used a piece of it under my photo on the left to create a visual reminder.


Bom Dia and Lazy Days mix wonderfully !!!

I hope you enjoyed these projects, I wish you a nice and crafty summer ❤

See you soon.

Love.


Na kolorowo i wakacyjnie | Anna Kaczmarek

Aka
 Hej, tu Ania,
Dawno nie zaglądałam do Was z inspiracjami kartkowymi,
więc dziś postanowiłam to nadrobić,
ale w dość niespotykany dla mnie sposób ;)

Kartki, które przygotowałam, stworzyłam niemal bez użycia nożyczek!
Niemal, bo na dwóch kartkach musiaÅ‚am przeciąć sznureczek.


W roli głównej, na każdej kartce, znalazły się wycięte elementy,
które znajdziecie w sklepie wÅ›ród czerwcowych nowoÅ›ci, 

Na pierwszej, bardzo smakowitej kartce,
umieściłam kalkę i w ten sposób uzyskałam nowy wzór - w kratkę!


Na drugiej kartce też królują gotowe, wycięte elementy
 - dwie cytryny, tag i napis.


Na trzeciej kartce, tak jak i na pozostaÅ‚ych, 
nakleiłam kolorowe naklejki - enamel dots.
SÄ… w piÄ™knych kolorach, pasujÄ…cych do bloczków papierów, 


Jak już pewnie zauważyliÅ›cie, wÅ›ród gotowych, wyciÄ™tych elementów, 
znajdujÄ… siÄ™ napisy.
Wystarczy wybrać i bez dÅ‚ugopisu, tuszu i stempla, 
mamy raz dwa gotowÄ… kartkÄ™!
Ostatnia kartka jest w delikatnych romantycznych kolorach 
i ponownie - wszystkie elementy były już wcześniej wycięte.


Jak tam, zachęciłam Was do zrobienia kartek bez używania nożyczek? ;)


Poniżej znajdziecie listę użytych przeze mnie przydasi i papierów ze sklepu Studio Forty.
pozdrawiam wakacyjnie!
Ania