Pokazywanie postów oznaczonych etykietą daydream collection. Pokaż wszystkie posty

Little bois - mini album Brigitta

3D dots; stickers; enamel dots; stamps; flowers; memories
Hi everyone, for today's release I created a very simple mini album that allows you to dedicate yourself to embellishing the pages.


I wanted to collect some photos of my boys with friends, on a day out around the city.


To make the mini I leave you a written tutorial:
For the cover cut a strip of white paper 15x30 cm and fold at 8-9-19.5-20.5 cm, from the patterned sheet cut a piece 29x14.5 cm and fold to 9.5-19.5 cm, glue in the centre of the white piece.


Then with another white piece create a flap to insert in the third page of 15x11 cm and fold at 1 cm, glue with opening towards the outside in the third page. Create a second flap with the vellum 15x10 cm fold at 1 cm and glue the vellum on the first flap.


Now all you have to do is decorate the cover and the pages, I hope you enjoyed this little tutorial.


If you want to take advantage of a gift discount for your purchases on the store's website, type BRIGITTA10.


   Have a good day Brigitta

Everyday Life Mini Album/Nicole Martel

daydream collection

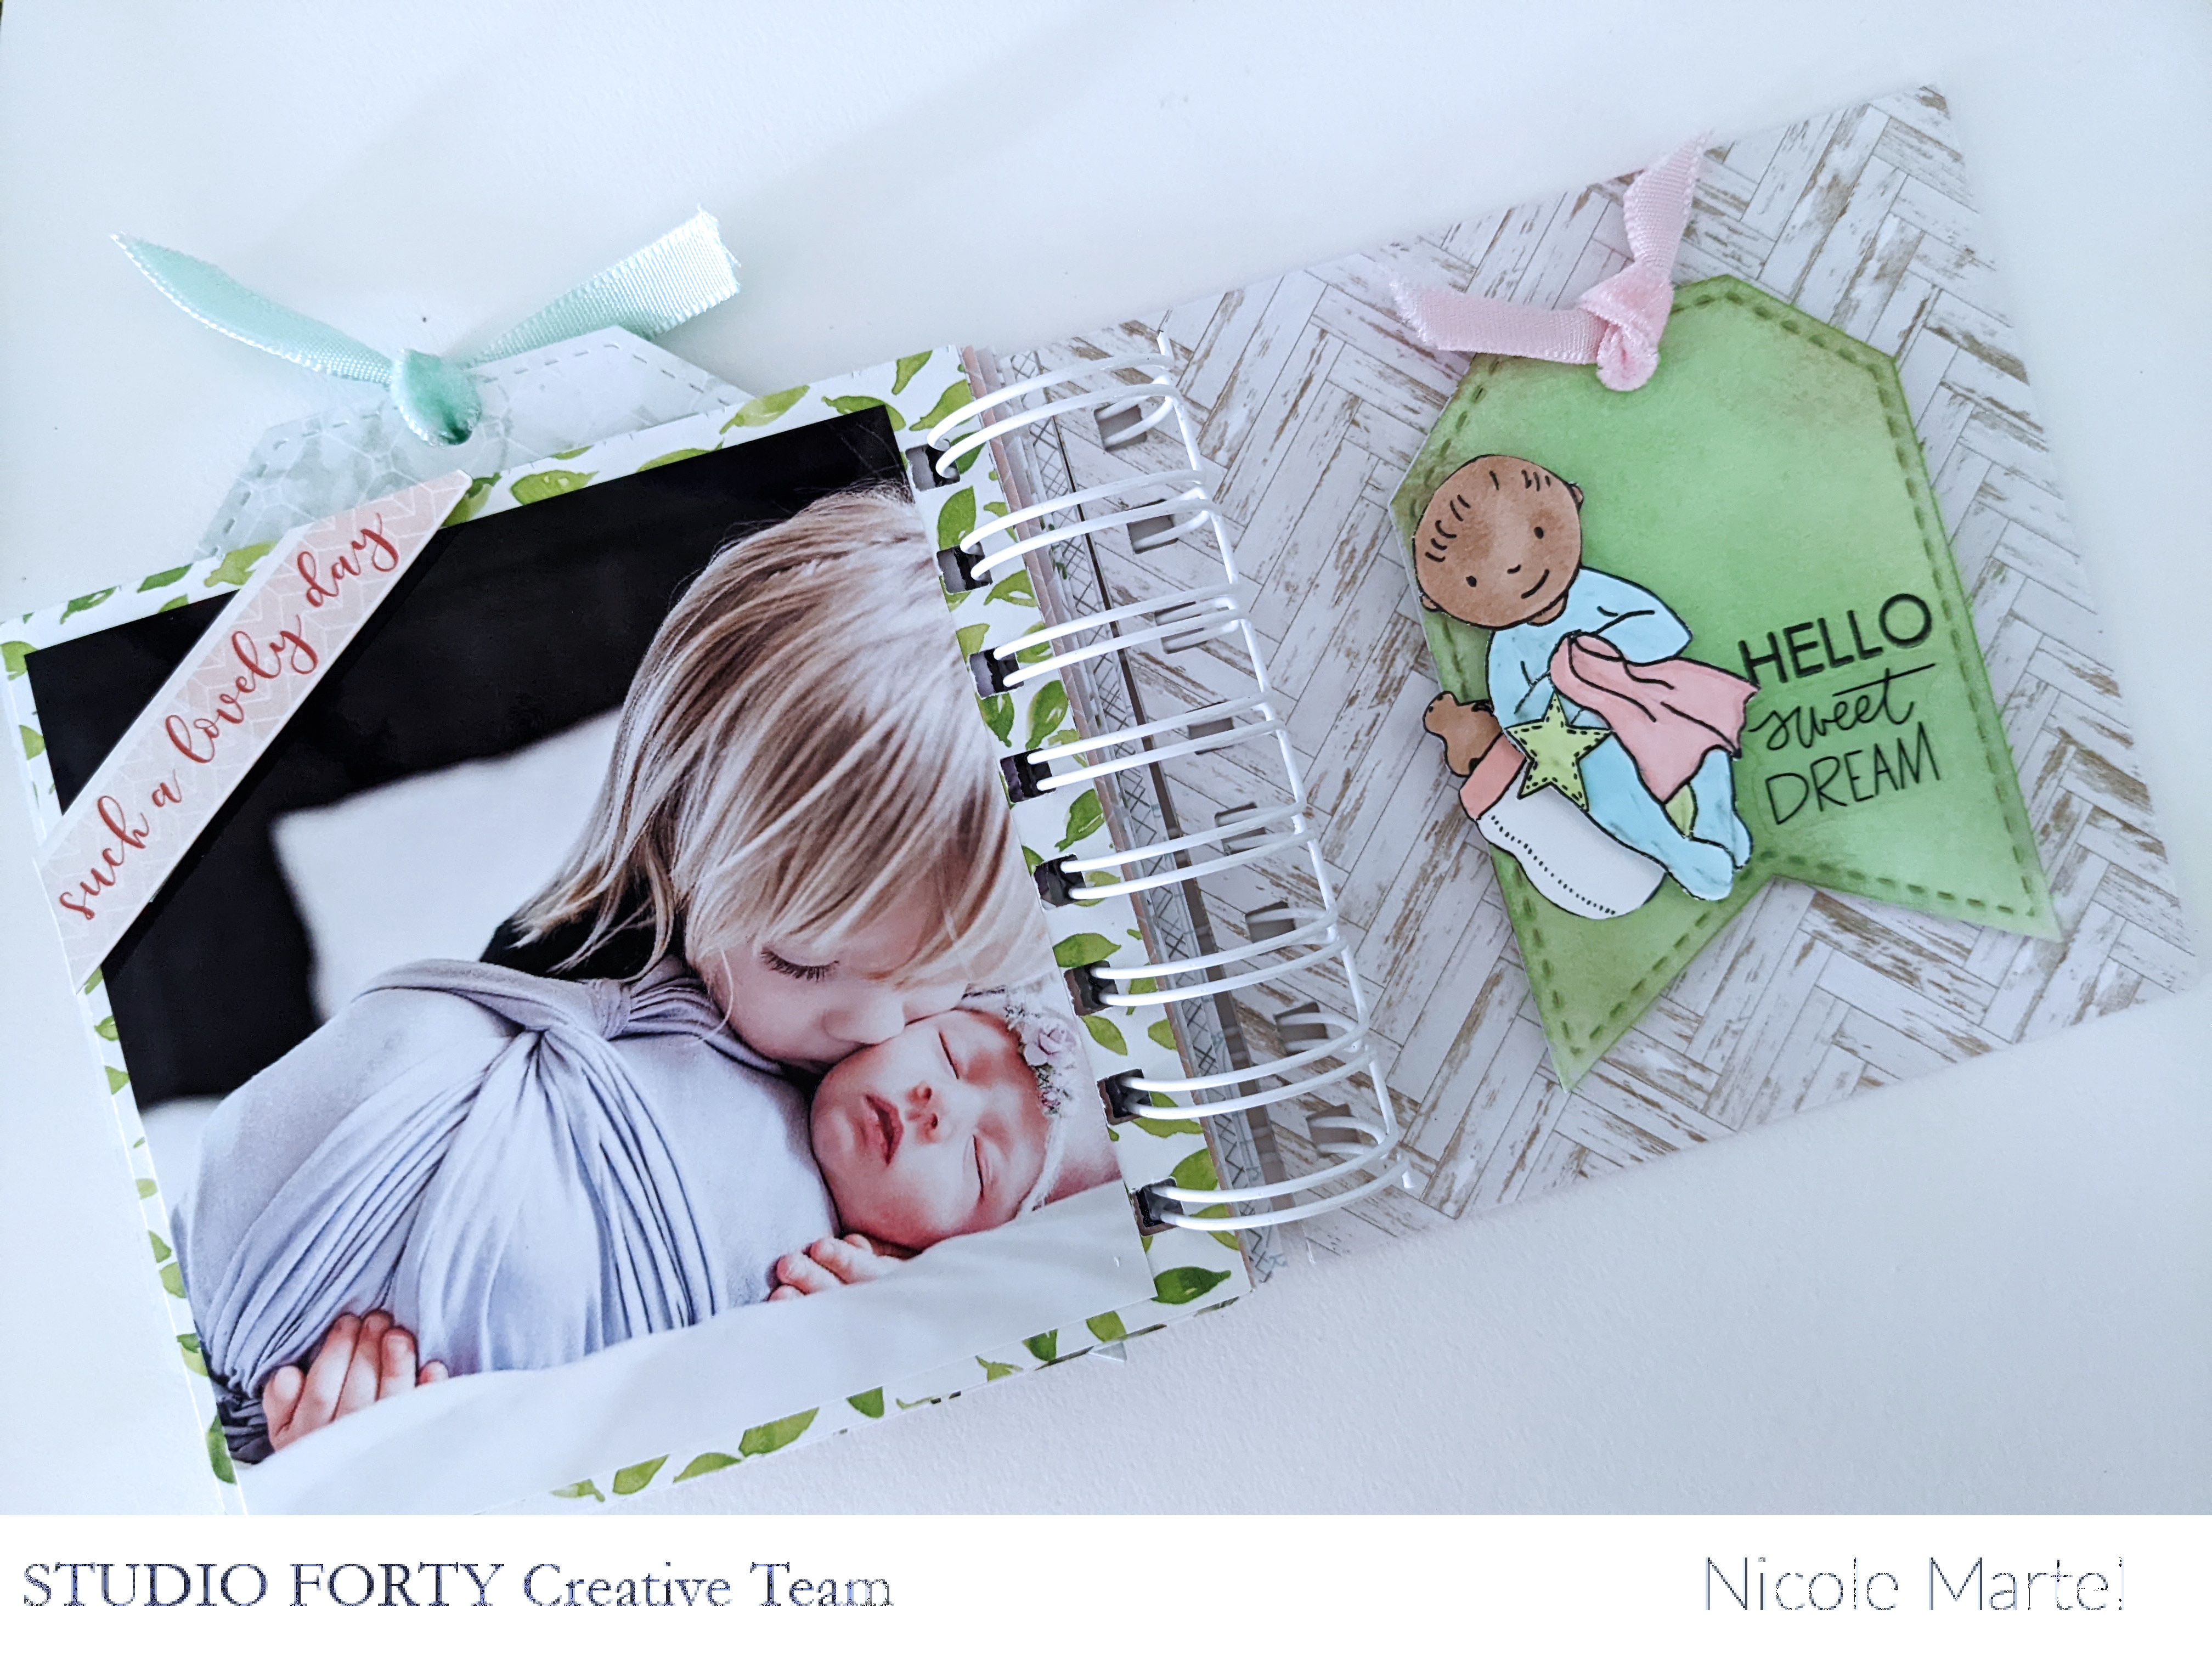
Hello, friends! I have an adorable mini album to share with you today. My sister just had her baby and pictures taken so I put together this simple, but beautiful mini album for her!


To begin, I printed several photos and cropped them to measure 4"x4". Then, I cut a variety of patterned paper to measure 4 1/2"x4 4/2". Next, I selected the embellishments I wanted to use from a variety of collections. 


I mounted the photos to the pages and then I used my Cinch to bind the pages together. I decided to use a 1" coil, rather than a smaller coil because I knew that by the time I finished this adorable mini, it would be a little bulky from the embellishments.

I covered two pieces of chipboard with patterned paper for the front and back cover of the album so that the outer layer isn't too flimsy.


Next, the fun part! Adding all of the beautiful embellishments to the album. This was my favorite part. It's always fun, playing with the embellishments in my stash! I tried to use things I've had for awhile...stash busting. All of the products are still available in the shop except for the die cuts.

I kept this album pretty simple, keeping the focus on the adorable photos. I think I added just the right amount of embellishments, without overdoing it.

You will notice, I follow the same design/format throughout the album. Embellishments on the left side of the album with the picture on the right side with a small amount of embellishments here and there to add dimension.

I love playing with chipboard frames. They are great embellishments. I used a few here with the chipboard sentiment layered. This was a happy mistake! I smudged ink on the photo and needed to cover it!

You may have seen my previous post on how I created this cute tag from the Never Grow Up stamp set. If not, click here to see how I made the tags in this mini! I told you they were going to be used in my next project. :)

I used foam squares to adhere the chipboard onto the photo and then cut the arrow from the chipboard frame.

Love the pop of green on this spread with the touch of pink! Isn't this the cutest picture you ever saw?!

Here's the cover. I used clear transparent stickers with a chipboard piece to complete the cover. Super simple. 


Thank you so much for visiting today!


Autumn layouts | Yukie Bessho

12x12 layout


***

Hello everyone! 

Hello September! 
SO, have you seen them???
Studio Forty has released beautiful new autumn/winter collections!!

Before sharing my projects with new collections, 
I would like to show you some
Autumn layouts with my favorite collections from the past, today.

The first layout I have mainly used GAIA collection’s travel note pack. 
TN paper packs can also make 12x12 layouts! This is a good example of that. 
Do you call it a blocking layout still? I am not sure…. 
But it’s very simple and easy to make. 

I wrote 'Hello Autumn 2016' by my hand on to the cut out from the journal card of the Travel note!


I did some 'pen stitches' and 
used some stamps to show some accents for stitching, Also the subtitles. These stitch stamps are very very handy. Must buy if you have not. 


Maybe the journaling was a little different, as you see I wrote in my language Japanese.  But surely it dies the same effect in any languages. 
The gems I have cut out from the travel note paper and placed as if they are hanging, using  the same stitches stamp. 


Used some pens for accents. But you need nothing so special.
Just one plain 12x12 cardstock or simple pattern paper, and the Travel Note pack!
Oops, do not forget the Studio Forty unique stamp set!


***


My second layout is from some collections in the past. 
Lunare collection, CozyTime collection, and white card stock. 
The enamel dots did great accent to the piece. 
I also used 'Hello Beautiful' from the die cut pack.


So this is it for today.  I hope you liked both the projects. 
Thank you for staying with me until the end. 

Next time, I will see you with Studio Forty's latest collections!!
Bye for now!


<The Gaia collection project>
Gaia Collection TN pack → Click here
Cozy Time collection paper → Click here


<Lunare COllection project>
Lunare collection paper  Garden Magic→  Click here
              Star trails→   Click here
Cozy Time collection paper → Click here
Day Dream enamels → Click here
Die cut pack from So Romantic collection → Click here
 

Vellum Layout and 6 inches | Yukie Bessho

6inches


 Hello everyone!

How are you doing with your crafty hobbies?

I have been quite busy working with papers . 

And I have to tell you these crafting time is such joy to me. 

***

Here today, I would like to share some layouts I have made with 6x6 inches paper pads and also a sheet of vellum.


First two are the 6x6inches layouts. I have used  Day Dream collection. This collection is great. Beautiful designs and colours. 

I have used some stamps from Lunare collection, too. These stamps made the layout a lot more special and I loved how they effect.


***


Here is the layout with vellum paper.  This one is 12x12 inches. 

Patterned papers are  from DayDream collection. I drew leaves by Kuretake Mangakapen.


These photos are from cherry picking. I wanted to place close-up cherry photo, too. But it looked too bright red and did not match the layout so I gave up , and placed some enamel dots and one sticker of cherry. Vellum is very fragile so I have adhered the whole layout on a plastic sheet. 

Hope you liked them all!


Day Dream 6x6 paper pad →Click here

Lunare stamp →Click here

Vellum sheet →Click here


Thank you for staying with me till the end. 

Until next time, stay safe and enjoy crafting!

xxx Yukie


Summer good vibes |Katarzyna Kowalicka

chipboard

 Cześć!


Lato, wakacje to dla większości czas podróży, wypadów weekendowych czy dłuższych wycieczek.
Dni są długie więc można dużo miejsc odwiedzić i wiele zobaczyć - szkoda byłoby nie skorzystać z tego czasu :)


A jak wiemy jak są podróże czy wycieczki to są też zdjęcia i powstają później albumy, wpisy w travelersach czy inne formy na zachowanie wspomnień.

Dawno nie pokazywałam Wam swoich wpisów w travel journalu więc dziś nadrabiam :)

Jest to wspomnienie z jednodniowej wycieczki w obrębie mojego województwa - na takie krótkie wypady zawsze znajdzie się czas i można odkryć wiele ciekawych miejsc.


Robiąc wpisy z tego wypadku postanowiłam, że zbieram wszystkie wakacyjne papiery, dodatki, stemple oraz elementy ozdobne w jednym miejscu i mam się świetnie bawić :)


Udało nam się odwiedzić kilka fajnych miejsc, spędzić wspólnie czas i mamy co wspominać - jak widzicie zdjęć sporo mam i super spędziłam czas na komponowaniu wszystkiego.

Karty do journalingu bardzo dobrze mi się wpisały w całą koncepcję - jeszcze nie robię projekt life'a ale zawsze karty znajdą miejsce w moich projektach :) służą jako małe "zakrywajki" gdy chcę coś sobie zapisać ale by nie było to widoczne od razu, podklejam na nich zdjęcia a także są świetną ozdobą.


Bardzo lubię też wycinać elementy z papierów - czy to tych dla nich dedykowanych czyli na przykład z okładek małych bloczków czy z dużych kolekcji a także właśnie z kart do journalingu. Ostatnio wycinałam też elementy z kalki - co możecie zobaczyć poniżej na zdjęciach. I kalka posłużyła mi również jako jedna z warstw przy kompozycji - ma wiele możliwości i zastosowań :)


Oczywiście nie byłabym sobą jakbym nie wykorzystała enamel dotsów i chipboardów :) Uwielbiam wycinać ale czasami też chętnie rozkładam taki zestaw już gotowych elementów i działam.
A kropki... no tak to kolejny po stemplach taki mój mały świr - ja znajdę dla nich miejsce wszędzie!

Mam nadzieję, że Was zainspirowałam do własnych projektów journalowych, że będziecie z tego czerpać dużo radości a po latach uśmiechniecie się wspominając.
Z mojej strony możecie liczyć na spam w tym temacie bo urlop dopiero przede mną ;)

Trzymajcie się ciepło, odpoczywajcie, zwiedzajcie i niech uśmiech niech nie schodzi z Waszych twarzy :)

Åšciskam!
Kaha


W swojej pracy wykorzystałam: