advent calendar
It's....TIME!!🎃 🧊🎄The season for traditions, family reunions, beautiful lights, tasty and delicious meals and the magic of Santa Claus has begun!🎊 Hello everyone! It's Nuria here today sharing an Advent Calendar mini-album! Let's get started!
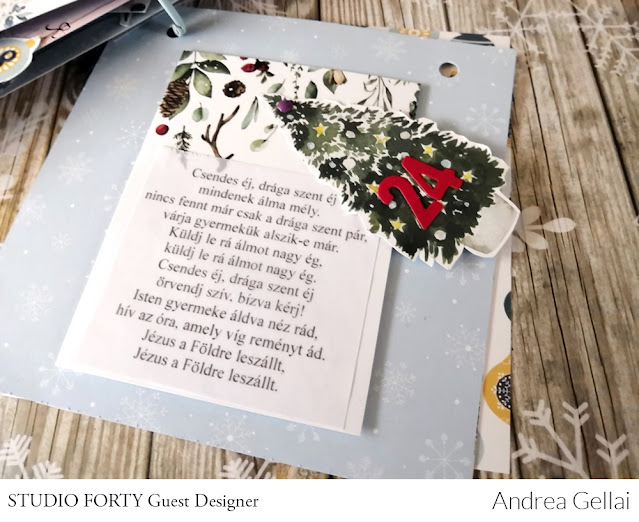
This Advent Calendar mini album is actually made of 3 "one sheet mini albums" put together. It has 24 pages for each day in December until Christmas Eve. For the structure, make 3 eight page pocket mini albums. I use patterned papers from
Nordica collection:
arctic,
wildflower and
forest walk. The mini albums are 3x4 inches.
Punch holes in the side of each mini album where it will be bound, make sure the holes are in the same place, so they match up when layered together. I make some pockets more when attaching the mini albums together, instead of gluing the pages completely.
The opening of the tag pockets is vertical and these are horizontal. I decorate with ribbons and slip
PL cards from Vintage Glow and
Together collections inside the horizontal pockets. Attach the rings to the holes to bind the minialbums.
As each day arrives, pull out the tag for that day and do that activity. Have Christmas FUN!
I wish you a very happy holidays and a very happy Christmas!
🎊
PS: Don't forget to visit Studio Forty shop website, you will get 10% off with the code nuria10! Thanks for stopping by and have a lovely week!
Nuria
advent calendar
Hello everyone! Here María again.
Today I show you this Advent Calendar that I have made with the Frosty Season and Joyfull collections (I have made a mix).
I have use two wood papers to make the base and then I have done twenty-five packet with white cardboard.
With Frosty Season collection and Joyfull collection I have decorated the pockets. In each one I have put a number and for that I have used gold cardboard.
To decorate the title I have used some elements like stickers, die cuts, stamps... I have put the year 2023, but If you want you can put "Advent Calendar" and you can use it more years. In my case, I have put a rope to hang it but it is not necessary.
I some pockets I have make some cards but I will put a little chocolate in each one also. To make this I have used two
set of
stamps,
stickers and die cuts.
I hope you liked it! Are you going to make your own advent calendar too?
I remind you that with the code MARIA10 you have a 10% discount!
See you in the next post!
María 🤍
advent calendar
Hello StudioForty friends!
Today I show you a special Advent calendar from the Frosty Season collection.
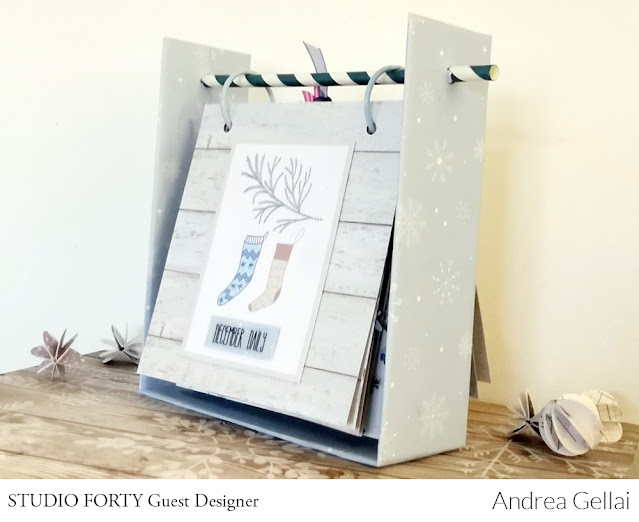
First I made the base
from a 5 cm wide gray plate. The bottom is 15 cm and the two sides are 17 cm,
which I punched at the top and stiffened with a paper straw.
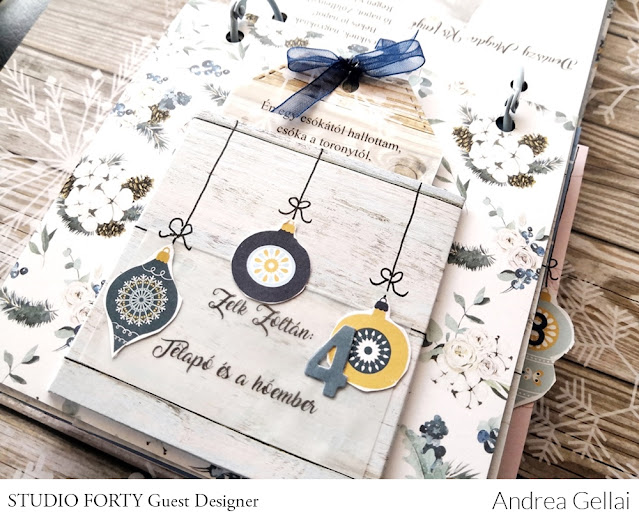
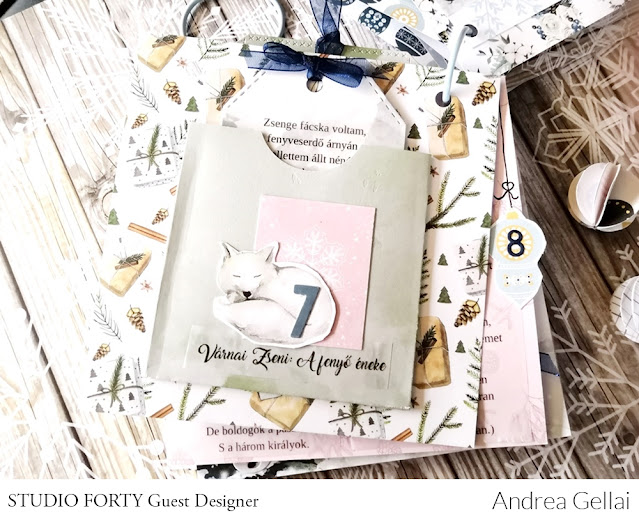
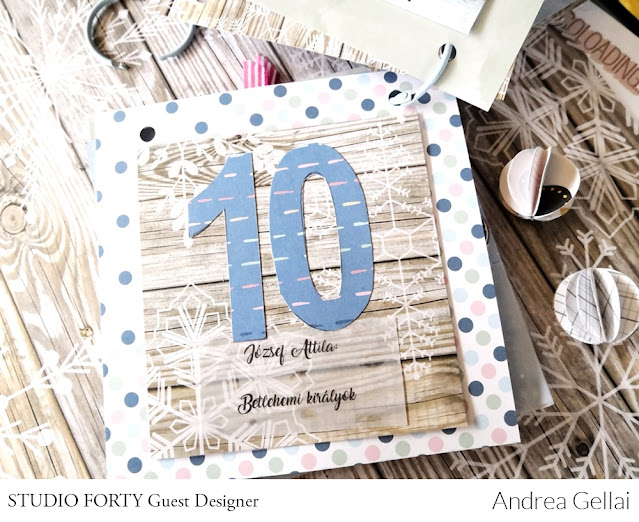
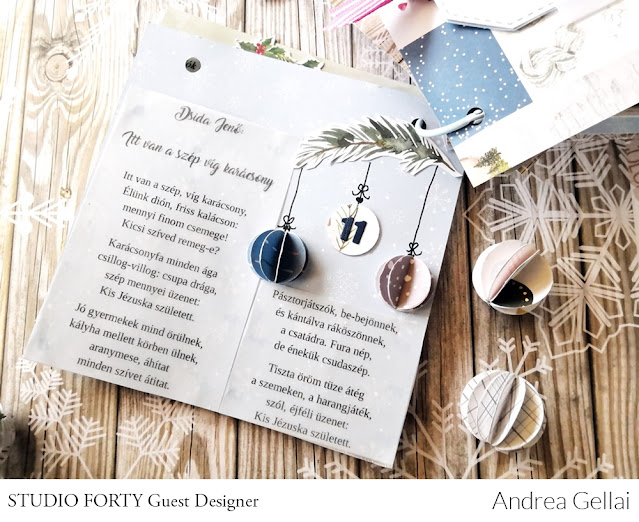
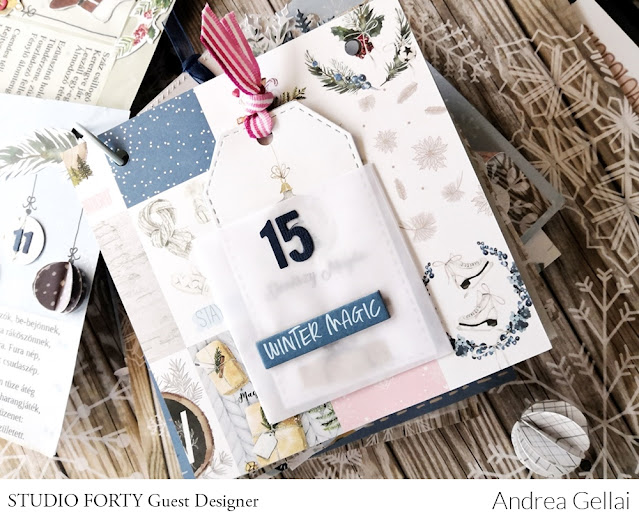
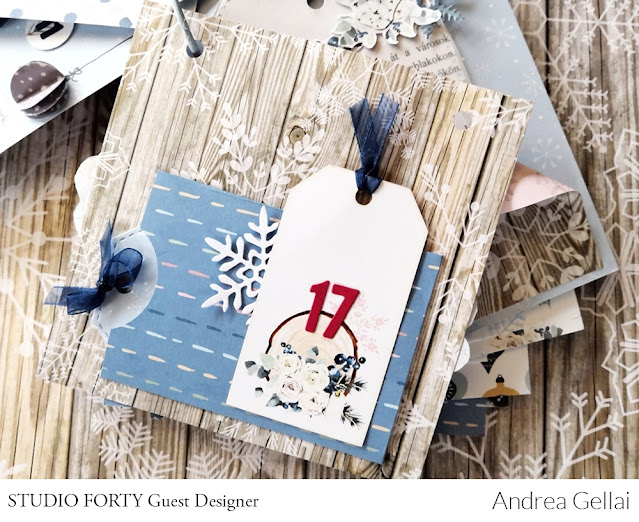
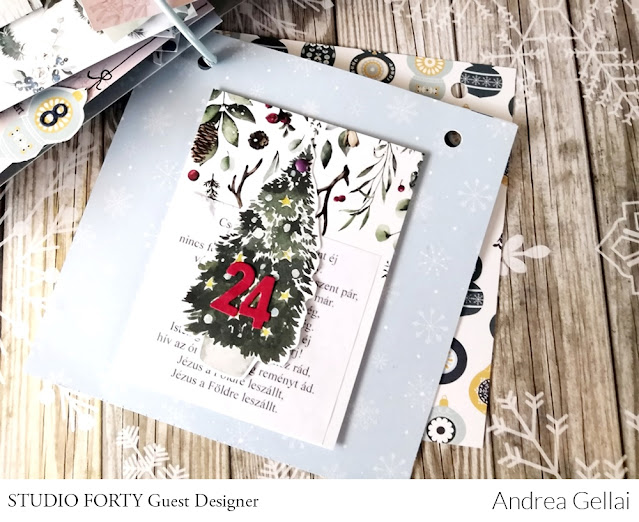
I cut 13 pieces of 13 * 13 cm sheets of patterned paper. The first one is the cover, the rest are decorated so, that you just have to turn them over at half-time and turn backwards. I made different pockets on several pages, in which the poems printed on the tags were inserted.
I decorated the pages with chipboard stickers, fussy cuts, diecuts, at some places with stamps.
I hope you enjoyed today's project.
Thanks for stopping by here today and happy crafting!
advent calendar
Happy Monday everyone!
How are you?
How will you start your creative week? I'm preparino some advent calendars this week. I have thought to make a surprise for my mother and for some friends, other than my children! So this is the final week, where ideas need to come and the calendars need to be ready for the next week!
I can't believe November it's almost finished argh! Please stop the time!
And you? Are you preparing the advent calendar this year?
Today I would like to share the second part of my project and many tips I have thought about lately.
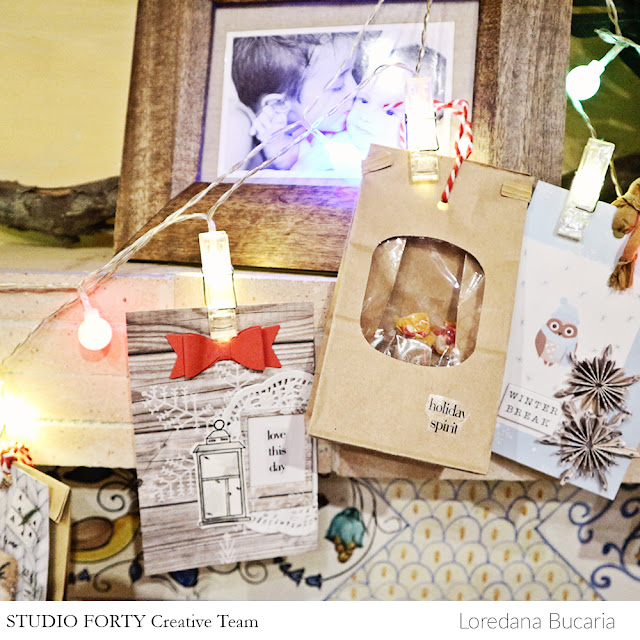
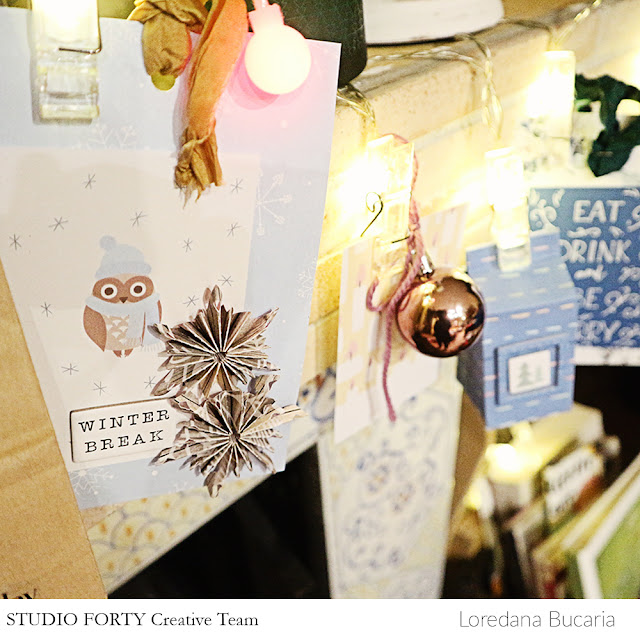
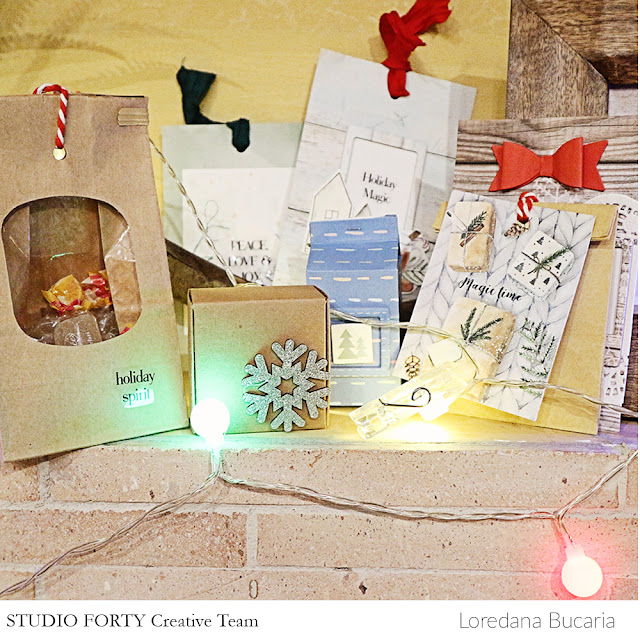
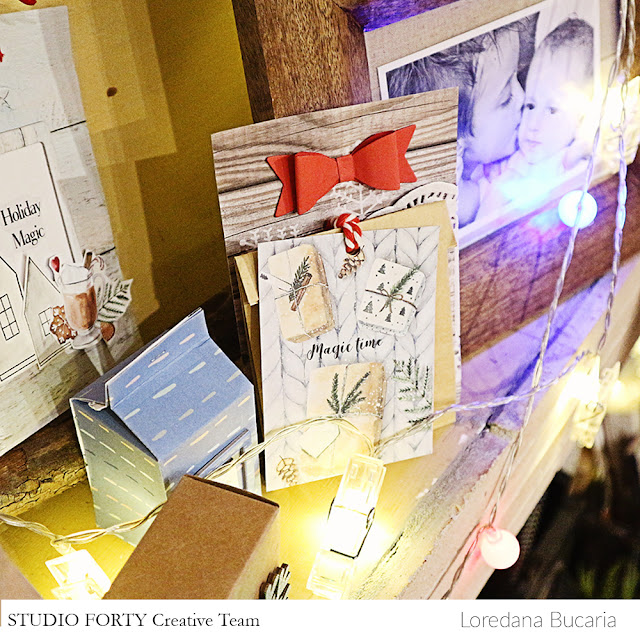
Usually I hold my calendar on a structure that changes year after year, this year I have thought about a wooden box for my children to close and to open each day with a key that the elf will bring with him.
For my mother, that is the recipient of this Advent Calendar I have thought to put everything in a white box and let her chose the card or the little package or the bag with candies she wants, so completely free with no numbers.
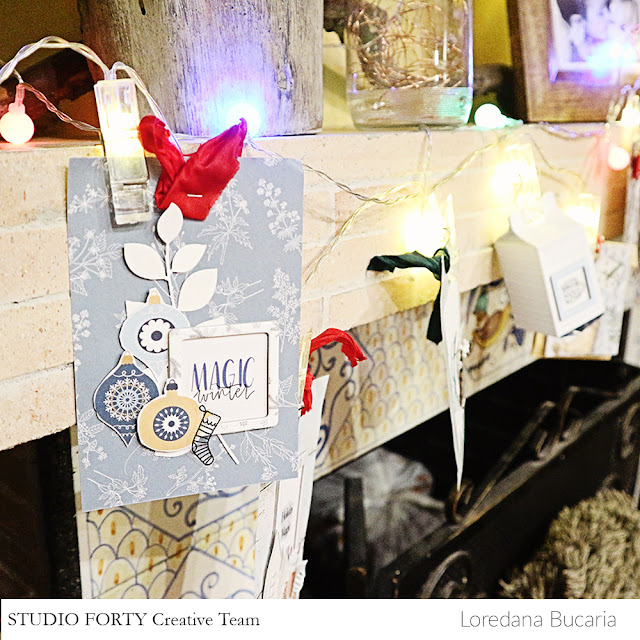
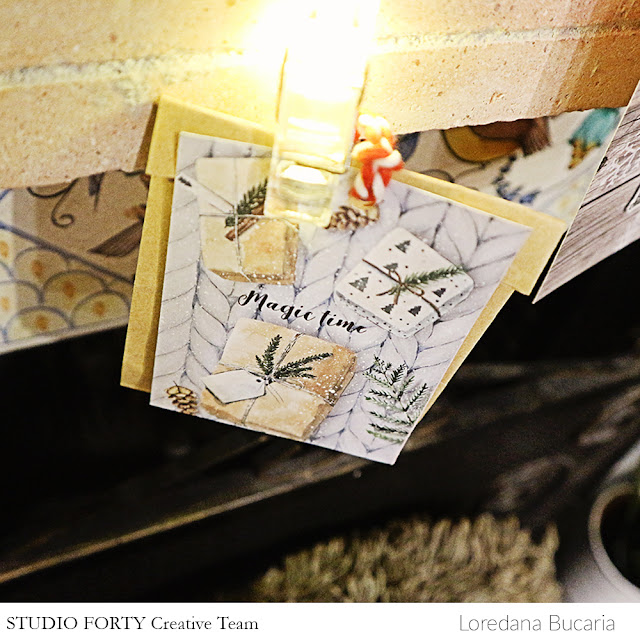
This same calendar can decorate your halls, your fireplace and when I have taken the pics of my project I have understood that it would be a great and so festive decoration just adding also some black and white pictures of the past Christmas times.
Some TIPS:
- use 3x4 journaling cards to close a little kraft bag
- create some little packages with dies
- decorate with just little touches paper bags for your candies
- add pictures and lights
- mix different kinds of embellishments from the clear stickers to the chipboards
- alternate packages and cards
- use twines, ribbons and wool thread
- watercolors are perfect to play with the gorgeous Studio Forty stamps
Hope you have a wonderful creative week and that this project inspires you to create your own advent calendar! I am so excited and can't wait to have all the little gifts to donate it to my mom!
Have a wonderful day
It's beginning to look a lot like Christmas!
Love, Lory
advent calendar
Hello December! And hello to all of you! Advent is here so today I will show you tags I prepared for my son's advent calendar. I used the mini collection WINTER FUN and I really enjoyed making these tags. Let's have a look at them.
I used natural cardstock and cut 24 tags on my Big Shot as basics. Than I decided to decor a bunch of tags with the same motiv. So I made six groups of four tags and started to decorate them. Mostly I used 6 x 8 papers, project life card and 3D embelishments.
For this tags I used velum with snowflakes as a backgroung and added white thread and some elements I cut from project cards. I didn't realy need the numbers on them as I stamped my own on a small white circle.
For other tags I cut small parts on the top from one of the papers and embossed snowflake with white embossing powder. I added velum snowflake and picture. I added liquid enamel dots on all tags and put ribbon in the hole.
And another tags ... I chose white circle as a background. Then I added silver modeling paste over a stencil and let dry. Finally I added string and picture, velum snowflake and a number.
Next tags are really cute - with trees, houses and a white rabbit from one of the papers. And on the top i s paper with grey stars.
And last tags ... On the first of them I used white and light turquois stripes from one of papers and these cute presents. And lastly - I glued cut piece from one of the papers on the top, added a stripe stickers and againg a piece of thread and cut elements.
So this part is done. Next - I will sew a fabric bags and attached these tags on them. Thanks for being here with me today. Have a great weekend and don't forget to light the first candle on Sunday.
Products I used:
.png "Menu")

.jpg)
.jpg)
.jpg)
.jpg)
.jpg)
.jpg)
.jpg)