alphas stickers
Hello everybody!
As you probably already know, you can find the beautiful autumn collection in the webshop and it is called: "Sweet Serenity"
Today I brought a layout as inspiration for which I already used this collection.
First of all, I colored a white cardboard with gelatos, then painted over it a little with a wet brush.
After drying, I stamped the paper horizontally using the clear stamp set Mehendi and Circles.
When I was done with these, I placed them nicely around my photo. From the "Lazy day" transparent sticker, I've long liked a word sticker that didn't have the word "wine" on it, but with a little creativity I solved this little thing, I´ve used the brand new color alphabet sticker set so this became the title of my page. I used two enamel dots because I love them very much and I wanted to use them too.
I hope you like my layout have a wonderful day and do not forget with the code HAJNAL10 you have a 10% discount in the shop.
See you soon.
cartincantevole
Hi guys! Today I am telling you about another great passion of mine: tags! I love to make them and include them in my projects: mini albums and layouts. I always have lots of them ready and useful to accompany a gift. With Studio Forty's new collection, "Let's relax", I had fun making some.
Each tag measures 6 cm x 10 cm. They can be made with a die cutter or by cutting them out to the size we like. Once the base has been created we can have fun embellishing them: this is my favourite time.
The Let's relax collection is full of embellishments, so all we have to do is unleash our creativity. We can create a small pocket above the tag in which to insert other small tags.
Or overlap the tag with a smaller one.
Create a circular hole in which to place embellishments. Have fun making fringes with thread... There are so many possibilities!
Here are the products used in detail:
Have a good day, Emanuela
3D dots
Hello friends! It's spring time now and for my inspiration I made some spring tags. They are super simple, fresh, colourful and spring-like!
To make them you can use a tag die cutter or cut out a 5 cm x 15 cm rectangle of white card and then cover it with papers from Studio Forty's Magic Garden collection.
I used SPRING TIME paper set of 18 Notebook size papers (have you already discovered the beautiful new Spring Time pad?), from which I cut out elements that I used as embellishments.
I made some stamps using the Spring Vibes set: I cut out the stamped elements and used them to embellish. I completed with some floral die-cuts, Spring Time dots and finally a white chain and tassel.
Remember to use double-sided adhesive with 1 and 2 mm thickness to give a greater 3D effect.
Thanks for reading my post and for stopping by! I hope you enjoyed it and that it inspires you.
Here are the products used in detail:
Have a nice day, Emanuela
essentials summer 2023
Hello friends! Nicole here with a mini tag book I created using the Essential Summer collection and a few metal dies I have in my stash. I love the floral printed paper and thought it would make a pretty book cover!
I'm not normally a pink person, but lately the color is wearing on me... and pink goes with flowers perfectly... and it looks so pretty against the black and white florals... it just pops!
I fussy cut a flower from the paper and mounted it on the pocket holder using foams squares to add dimension. Next, I added some pale pink sticker dots and die cuts. I decided to add the slice of watermelon to add a bit more pink!
I punched the photos and tags out using a metal die and added some ribbon and
transparent stickers and embellishments.
Isn't this lovely?! I try to think of different things to create other than layouts etc... and I think this is my favorite project I created so far this year. I hope you found this project inspiring! Check out the Essential Summer collection,
here and use nicole10 to save 10% on your purchase! Thank you for visiting today!
cards
Hello friends! This is Nuria with a
layout inspiration made with the new
Essentials Summer collection! Summer is here and it can be terrific and terrible at the same time, don't you think? But a pool (any) always make days easier and showing your children how to do a handstand is the perfect excuse for playing in the water all day long... And that includes me! ;)
This time the LO is 6'*8' format. I used this beautiful
squared blue patterned paper as a base. On top of it, a white cardstock where all elements are widespread. On the right hand of the white cardstock I placed the picture with a
yellow stripped patterned paper underneath and two strips of
paper as a decoration on top right of the pic.
On the left hand, I placed all embellishment elements in vertical wrapped with white thread. But let's see it in detail!
First of all, I
stamped on the left of the white cardstock a
leaf, a
location symbol, a
beautiful heart and a
tiny flower. Then, I crop two holes, wrapped the white thread carefully and added the different elements. Finally, I embellished with eyelets.
And that's all for today! Hope you enjoyed today's post and don't forget to visit Studio Forty shop website, you will get 10% off with the code nuria10!
Have a lovely weekend!
Nuria
clear stamps
Hey there! It's Nuria today showing you a way to scrap your scraps! You know I love to use white cardboard in most of my projects, adding some mixmedia on them. More frequently than you may think, I missed up the project and have to start again. No problem, mistakes are part of learning. But what to do with this material?... Take your scraps and your stamps and let's do some tags with the versatile
Essentials collection.
The background of these tags is already done (whatever you couldn't use previously is perfectly valid) and then you start stamping, playing with colours, with a central element and a sentiment.
I love how different they are, although being created with similar materials! Which one is your favourite?
Have a lovely week and don't forget to visit Studio Forty shop website, you will get 10% off with the code nuria10!
Nuria
12x12 layout
Hello Studio Forty lovers! Kerstin here and I have a new 12 x 12 layout inspiraton for you! I'm in love with the black and white papers from the Essentials Paper Set Notebook! I'll show you what I made with and from these papers! Let's get started!
I chose the triangle and plaid paper as base. In the center I rolled 2 rolls each from a 2 inch wide strip with a thin pencil, taped them together with double sided tape. I glued the rolls with double sided tape as well.
At the top of my layout, I used various ephemera from the Essentials Paper Ephemera Set. I stapled my photo to a paper scrap, with vellum in between, and added a ribbon scrap.
I cut my title "This+That" from an Essentials Journaling card. Of course, flowers can not be missing. The Essentials Flower Stickers set is just gorgeous!
Here I used one of the cute Essential Seals. In addition, Essentials 3D Stickers Dots may not be missing.
I hope you like this inspiration! Thanks for stopping by!
See you soon!
Kerstin xx
SUPPLIES: Essentials Paper Set Notebook I Essentials Journaling Cards Pad I Essentials Just Lovely Color Stickers I Essentials Flower Color Stickers Set I Essentials Words Color Stickers Set I Essentials Tabs Yellow Color Stickers Set I Essentials Tabs Pink Color Stickers Set I Essentials Tabs Mint Color Stickers Set I Essentials Paper Ephemera Set I Essentials Seals I Essentials Envelopes and Tabs Elements I Essentials Dots 3D Stickers I To Do Labels Stamp Set #168
clear stamps
Witam Was ciepło!
Za kilka dni w kalendarzu zagości grudzień, więc już na całego rozkręcam się ze świątecznymi inspiracjami. Dziś są to dwie zawieszki do prezentów. Dzięki takim dodatkom samo opakowanie upominków może być bardzo skromne - zawieszki zrobią efekt WOW ;)
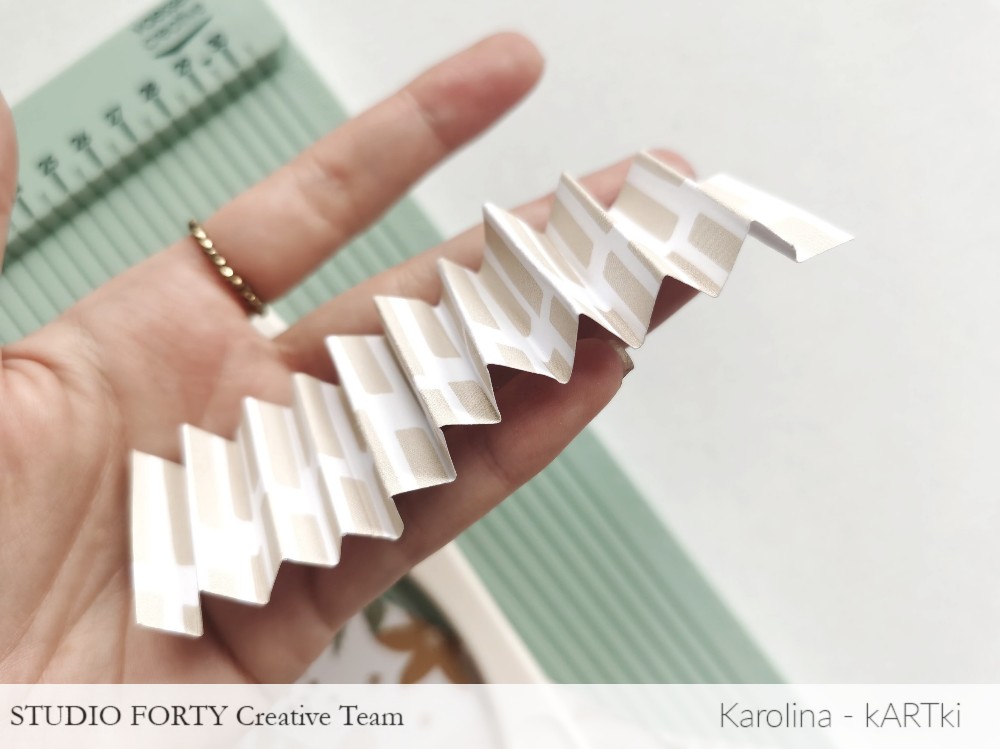
Bazy zawieszek wycięłam ze sztywnego kartonu i okleiłam ślicznym gwiazdkowym papierem All Is Bright. Chciałam żeby były bardziej przestrzenne niż te tradycyjne, w związku z czym pomyślałam o rozetkach. Ale co zrobić gdy nie mamy odpowiedniego wykrojnika?
Bez problemu można sobie poradzić używając bigownicy, a nawet bez niej jest to do zrobienia. Ja odcięłam dwa paski o wymiarach 30 x 3,5 cm z arkuszy Warm Wishes i Warm & Cozy, następnie przebigowałam je całe co 1 cm. Później wystarczy już tylko złożyć je w harmonijkę i uformować w rozetki, lub półrozetki jak ja tutaj.
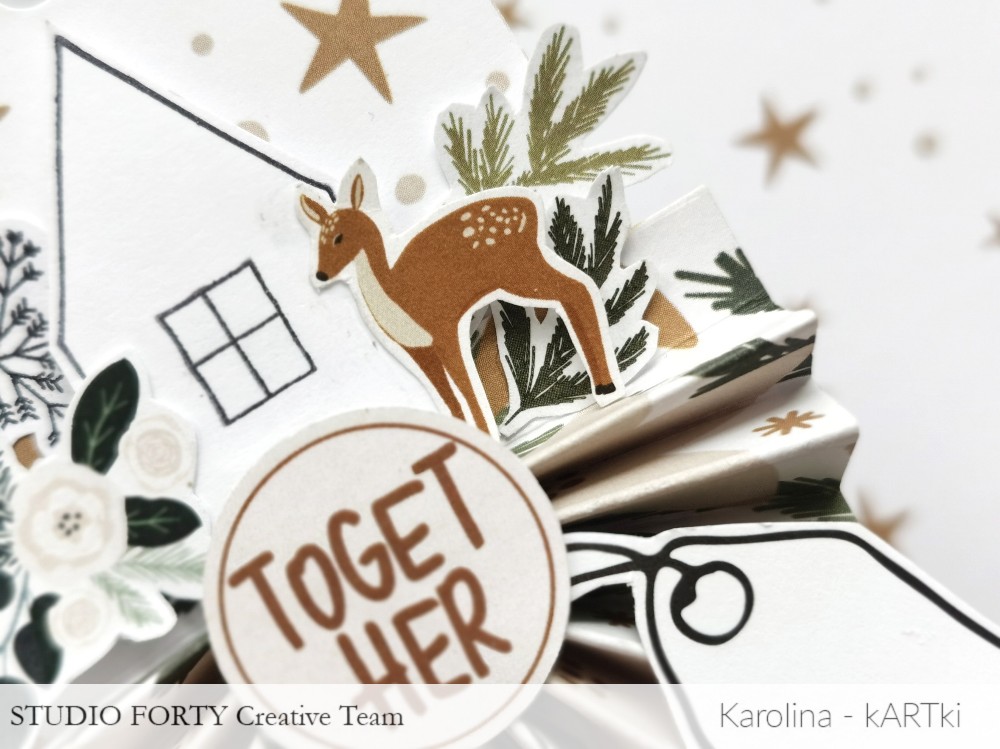
Kiedyś pisałam już, że bardzo lubię nasze okrągłe naklejki i bardzo się cieszę, że znalazły się takie też w kolekcji TOGETHER. Tworzą one zgrany duet z rozetkami.
Jako dodatki do ozdobienia zawieszek wykorzystałam elementy z zestawu elementów Together - Winter oraz odbitki stempli z zestawu December Days i Holiday Cheer, a także wycięte z karty do journalingu zawieszki, na których będę pisać imiona osób, dla których mam upominki.
Jeszcze tylko wstążeczka i gotowe!
Pozdrawiam.
.png "Menu")


